Filtering by Author: Stevene

Video Series on Making Quality Hide Glue


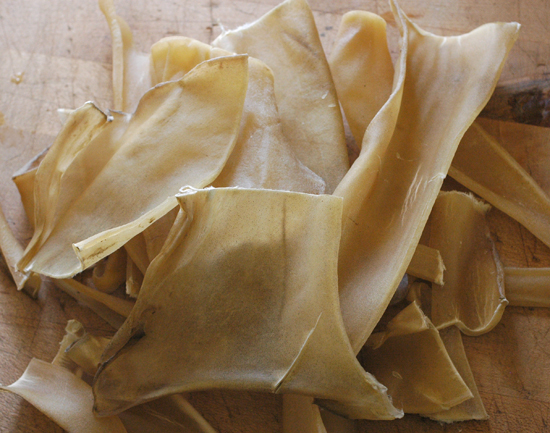
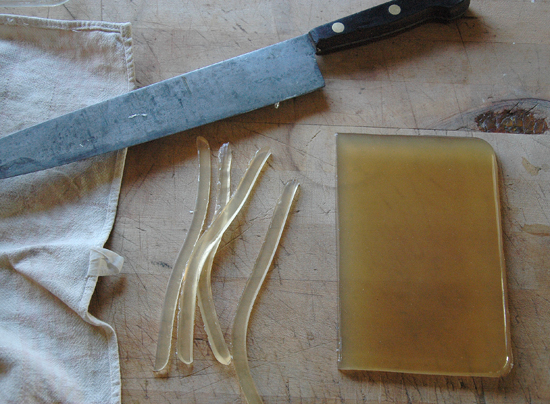
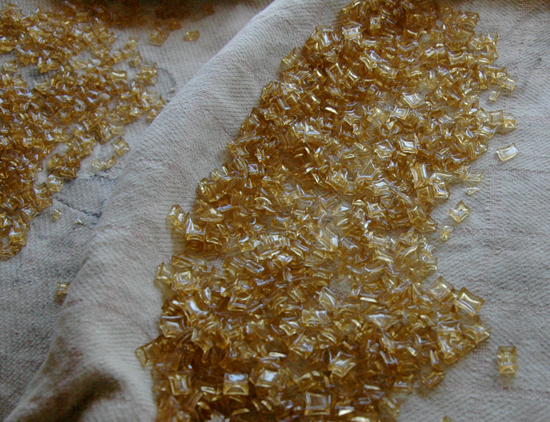
I'm shooting a video series on making high grade hide glue.  At least that is the goal, we'll see when I test the glue after it's finished, or maybe have it tested by someone else.  The third video, on liming, is uploading to YouTube as I'm typing this.  The approach is a sort of learn as you follow along kind of thing, going through the process of turning a cattle hide from Tamara's recent cattle processing class into hide glue.  Every time I go to work on the skin, I take some video and edit it down.  One section is sort of a lecture type deal with some chalkboard action, one is on fleshing and, aside from the liming one uploading now, the others will be de-hairing and de-liming, cooking and pouring, then finally cutting and drying.  Maybe at some point there will be one on testing the finished glue.

This hide glue series will be fairly long, but there are things in there to learn beyond making hide glue.  Little snippets about other stuff relating to tanning skins and such inevitably work their way in.  No process is an island after all.  So far these videos have been decidedly lacking in popularity and the total number of people that really get a lot out of this will probably not be that many.  But it will be there when people are ready for it, and that is most of the reason I do this stuff at this point, as a reference archive and so it doesn't all die with me one day.  Personally, I think it's really cool, even though I've so far mostly restrained myself from going on long tangents about multiple related processes and ideas.  Poking around looking at other hide glue videos on youtube, a lot (or most?) of them use rawhide chew toys cut up in pieces.  Nothing wrong with that in context I suppose, but that has never been what we, or the genesis of Paleotechnics, has ever been about.  I'm definitely bringing you something closer to the ground up version.

The link below goes to the main Playlist into which all videos in the series will be placed as they come out.  I think anyone with any kind of google account, like Gmail, can subscribe for updates.  My channel, for now, is a mixed bag of stuff I get up to.  I'm also currently also doing a series on amateur apple breeding, which will follow my progress over the years attempting to breed up some new red fleshed apples here at the Turkeysong experimental homestead.  For the hide glue series,  I'm in the dehairing/refleshing/deliming process now, so that one should be up soon.  When finished, I will probably sell the glue on Etsy.  If that works, maybe I'll add artisan hide glue making to my list of little income sources.  Artisanal hide glue for artisanal artisans, you know instrument makers, fine artists who use traditional materials, fine woodworkers that want their furniture to be fully repairable in the future and the likes of them.  People who are keepin' it real!  See ya...

glue#1thumbFINISHEDYELLOW

Seasoning Bones: How to avoid cracking in drying bones

bone seasoning header

Typical cracking along the grain of the bone. Bone, like wood, has a grain direction.

Bone is a beautiful and useful material, but if you pick up any random bone from the yard, or one that has been buried, it may very well be cracked.  That is because bones contain quite a bit of water and, like wood, when drying bone is subjected to stresses caused by shrinkage.  Something has to give if the stress is high, and the bone will start to come apart along the grain forming “checks”.  Rules similar to those for drying wood without checking can be applied to bone.

Size matters:  Like a large piece of wood, a large bone is more liable to crack than a small one.  Small bones will often dry without cracking regardless of how they are dried.  If I bury a leg and dig it up a year later, none of the small toe bones will be cracked, but most of the larger leg bones will have checks in them.

Speed matters:  Drying things fast causes more stress than drying things slow.  That is because when things dry they shrink.  As the outside, which is drying faster, shrinks, it has to shrink around the plumper, slower drying interior and cracks are liable to form in the outside.  It helps quite a bit that bones are hollow.  One way to decrease checking in wood is to bore a hole through the center.  But, most bones already have that.

Bone is very dense:  Dense materials tend to check more easily than less dense materials.  Very heavy dense woods are more liable to cracking in general than light porous woods for instance.  So, even though bones generally have the advantage of being hollow, they still have a strong tendency to check if not dried in a controlled way.  If a bone was as thick as a tree or as a split piece of wood, I doubt there would be much that you could do to prevent checking, or at least it would take extreme measures.

Control drying:  The best way to avoid checking is to control the speed of drying, and there are several ways to do this.      

*Humid environment:  Drying in a humid environment slows moisture loss, and that’s what it’s all about.  If the moisture loss is gradual, moisture from the interior of the bone has time to redistribute throughout the bone, resulting in more even moisture loss, which translates to less stress on the bone’s structure.      

*Slowing drying of the exterior with a coating:  Coating the bone with something to slow the drying of the exterior will also allow the whole bone to dry at a more even rate, greatly reducing the likelihood of checking.  Using animal fat is easy and effective.  Fat can also seep into the bone replacing some of the water.

This bone was not oiled, but just dried in the shade. It didn't crack because the oil from inside it, the marrow oil, seeped into the bone, replacing the water. it was also dried in the shade.

      *Boiling:  I actually don’t know if this works for bone for sure, but boiling wood can reduce checking.  I think it works by breaking down the cell structure of the plant allowing water to move from the inside of the wood to the outside.  It seems to me that boiled bones have less tendency to check when drying, but that is a very casual observation and one I’m not willing to stand behind.  Boiling a bone definitely removes some of the protein material that cements it together, so I don’t recommend long boiling for the most part, since it may weaken the structure, though I suppose it depends on what you are planning to use it for.  Further experimentation is definitely needed.  I would say that if other methods are used carefully boiling is unnecessary, but could be an alternative and is interesting regardless and who knows if it might be useful someday.

This bone is heavily checked from repeated wetting and drying as well as baking very dry in the sun. Also, there is no oil left in the bone after so much time and weathering. Bone, again like wood, prefers to have a little oil in it.

If you only want a small piece of bone, just go out and find one and break it or cut it up.  Examine it VERY CLOSELY for any checks if you are about to invest any significant amount of effort into making something nice.  I speak from experience :-/   Bones, like wood, have a grain that runs longwise.  If the bone is checked and it is cut across the grain, whatever you make might very well fall apart.

If I want a bone completely unchecked for making tools or jewelry or something like that, here is what I usually do and it seems to work very well. Like wood, fresh bone can form checks very quickly in hot dry weather, and I mean within minutes, not hours, so don’t leave them in the sun, and don’t procrastinate too much.  Again, this depends on the bone’s character, size, thickness, the weather etc... but just be warned that it can happen very fast. Saw off the ends if you don’t need them.  Clean out the marrow with a stick. This allows the interior of the bone to dry along with the outside, which means even moisture loss and less checking.  Plenty of marrow oil will usually stay inside the hollow portion of the bone. Scrape the outside of the bone clean with a knife, a stone flake or a piece of broken glass. Oil it heavily, preferably with a heavy tallow type of oil such as that from deer, goat, elk, moose, sheep, antelope or cattle.  Put it on really thick.

Deer bone from this year oiled with Deer tallow, which is so thick that it acts almost like a wax, resulting in very slow drying.

If using a lighter oil, like lard, bear, raccoon etc, or if the bone is very large and thick, you may want to put the bones in a plastic bag for extra insurance.  Don’t seal the bag.  Leave it very slightly open, or poke some holes in it to let moisture escape slowly.  This may not be necessary, but is good insurance and easy enough to do. Keep out of the sun or very hot areas, to assure slower drying. I’ve seasoned many bones successfully this way and actually can’t recall any failures.  By contrast, bones left lying about will generally form checks unless they are very small or thin. I have a small collection of seasoned bone that I keep around.  When I run across a really nice thick walled bone that I might want to use for something later, I’ll season it out as above and store it for eventual use.

It's also good to know that fresh bone is much easier to work that seasoned bone. If you just keep a little oil on the bone and work in the shade, you can make your item out of fresh green bone and then oil it to season out when you're done.

A few of my stash of seasoned bones for making stuff. I wish I had some pictures of all the cool bone stuff I've made over the years, but I don't.

Posted on September 18, 2014 and filed under Animal Parts, materials.

Some very cool films on Acorn and Buckeye Processing

There are lots of ways to process acorns.  These amazing old films show traditional processing in enough detail for a person to really learn something.  Processing of the California buckeye is much less common, but this video shows how it is done.  The buckeye nuts are poisonous raw, but they are not hard to process and it shouldn't be overly intimidating.  It's also just really great to watch these ladies at work with their deft hands, and listen to the singing, which is,  for lack of a better description, very grounding.   Thanks to the wonders of the information age, these once very hard to get films are now available to see.  Check 'em out!  

http://www.youtube.com/watch?v=-kQ9sA5ONxA


https://www.youtube.com/watch?v=zhqNTgMaJIc


https://www.youtube.com/watch?v=cxoOCHyOO_Q


https://www.youtube.com/watch?v=VMSStfqEhsU

Posted on June 6, 2014 and filed under food.

Lampblack, what it is and what it's good for

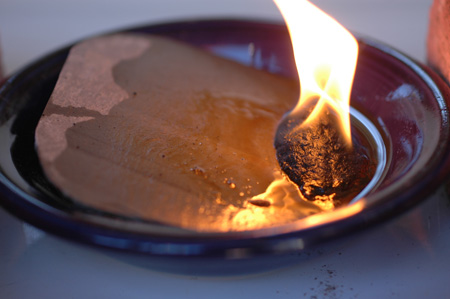
lampblack header Lampblack is a form of carbon.  You can think of it as something like very, very finely divided charcoal.  Because it is so incredibly fine, a small amount covers a large area giving an intense black color.  It forms the basis of the best traditional black inks and has been used to many other ends from shoe polish to blackening gun sights.  Lamblack’s extreme opacity and complete resistance to fading are excellent characteristics for use in the arts

Lampblack can be made from burning oily or resinous materials, while collecting the resulting soot.  The pitch of pine trees and other conifers make good lamp blacks, as do oils burned with a wick.  It has also traditionally been collected from the inside of oil lamp mantles (the clear glass covering over oil lamps), thus the name.  The trick to producing it yourself is to burn the material in such a way that combustion is incomplete.  When combustion is complete, the carbon is fully burned, but if the flame is interrupted, or just plain inefficient, some of the carbon remains as soot along with other unburned chemicals.  The rising black soot can be collected on a metal plate, bowl or flat stone.

Using a large and lumpy, or long, wick will usually create a lot of soot.  Another way to create incomplete combustion is to interrupt the flame.  You may have noticed that when an object is held in a candle flame, soot results.  When the wick is trimmed or made properly and the flame is burning cleanly, the carbon will be completely burned to up at the tip of the flame and no soot results.  The truth is that it is somewhat challenging to make wicks which do NOT soot!  The modern candle wick is an exception, not the rule.  But for making lampblack, you want a whole LOT of soot, so make that flame as dirty as possible.

Flame interrupted.

A good way to make lamp black under field conditions is to make a small table like arrangement of stones.  Pitch or pitch saturated wood from pine or other conifers is burned under the top plate and the soot brushed off with a feather occasionally.  I have some picture of that somewhere, but they are like that old kind that are on paper...  Any kind of oil lamp arrangement with a plate of some kind on top will also work fine.  A tuna can with the lid left partly attached and bent down to form a ramp into the oil is an easy solution.
df

f

d

Lampblack is not at all easily mixed with water.  In fact, it is remarkably difficult to get the two together.  One time I was tattooing my friend Wylie’s leg (I have pictures of that somewhere too...) with pine soot and figured out that if I spilled beer into the ink, it mixed easier.  Yay for beer!  It can be mixed with plain water sometimes if a very small amount of water is used, but it can also be almost impossible and a drop of alcohol helps break the surface tension.  Lamp black is much used for tattooing around the world, being much finer than charcoal. I have two small tattoo test spots on my leg made by slicing the skin with obsidian and rubbing stuff in.  The one with charcoal is uneven, while the one with lampblack is much cleaner.  A third made with iron oxide (red ochre, a mineral pigment) is long gone, having faded away completely.

Often lampblack is somewhat oily containing compounds created by the heat destruction of the oil or pitch that are not pure carbon.  The lampblack can be purified to an extent by re-burning it in an oxygen free environment.  If put in a small sealed tin, it can be burned in a fire to clean it up a little.  My results calcining soot this way have been mixed, and I’m unsure whether it is necessary.  Another old book (quoted below) recommends packing into an open ended tube for re-burning.  I'll try that next time.

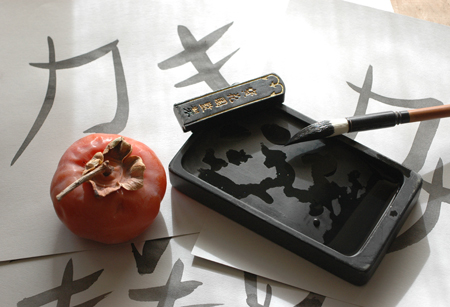
Asian inks are usually made as a solid stick by mixing lampblack with a small amount of collagen glue made from hides, sinew or especially antler.  The stick is then rubbed up with a little water on a special stone and the ink used immediately.  I hope to do almost all illustrations for paleotechnic’s publications with this type of home made ink, and other home made art materials, from here on out.  Carbon ink works great with a feather quill pen (that'll have to be another post)   What is called india Ink is originally a soot based ink as well, but in liquid form.  Since I lost the last ink stick that I made (someone probably threw it out, because it looked like a fossilized anteater turd, though it was perfectly functional), and have to make another, yet another future post may just have to cover ink making in detail!  For now, you know what lamblack is, and how to make it and you can build from there.  If you just want to blacken your gun sights, or whip up some corpse paint, it's easy to make a small amount of lamp black with a candle or chunk of pitch.  Another brick in the wall of self reliance.

asian shit

I’ll leave you with a couple of quotes from old books scrounged up by using a google books search limited to the 19th century.

Technical Repository, Volume 11  T Cadell, 1827

Black shell-lac varnish.—Shell-lac varnish may be rendered black, by mixing with it with either ivory, or lamp-black. The editor has frequently used, and always preferred the latter. It should not be used as sold in the shops, being then greasy, as the workmen call it, and will neither mix or dry, well. Sometimes the lamp-black contains particles of plaster, from the walls of the chambers in which it is made; this, of course, should be rejected.

To prepare lamp black for use.—Press a portion of it into an earthen or metallic vessel, which may be made red hot in the fire; for small quantities, a tobacco pipe, a piece of a gun-barrel, or any other metallic tube, will answer the purpose perfectly well. It is not necessary to close the vessel, but the powder should be well rammed in; place the whole in an open fire until it is red-hot throughout; this may be known by the lamp-black ceasing to flame at the exposed parts; take it from the fire, and allow it to become quite cool before you remove it from the vessel, otherwise it will burn into ashes. Lamp-black, thus prepared, will mix readily with water, will dry well in paint or varnish, and will be improved in colour.

To mix the colour with the varnish.—Rub the lampblack up with a little alcohol, spirits of turpentine, or weak varnish, taking care to make it perfectly smooth before putting it into the cup with the varnish. To give a good black colour, the quantity of lamp-black must be considerable; this, it is true, will lessen the brilliancy of the varnish in some degree, but a thin coat of seed-lac, will diminish this fault. When only a small quantity of blackvarnish is wanted, it may be made by dissolving black sealing wax in alcohol. Sealing wax being composed principally of shell-lac. But little heat should be employed, or the black colour will be precipitated.

Five Thousand Receipts in All the Useful and Domestic Arts: Constituting a Complete and Universal Practical Library, and Operative Cyclopaedia

A. Small, 1825

Lamp black may be rendered mellower by making it with black which has been kept an hour in a state of redness in a close Crucible. It then loses the matter which accompanies this kind of soot.;

TO MAKE PAINTS FROM LAMP BLACK.

The consumption of lamp black is very extensive in common painting. It serves to modify the brightness of the tones of the other colours, or to facilitate the composition of secondary colours. The oil paint applied to iron grates and railing, and the paint applied to paper snuff boxes, to those made of tin plate, and to other articles with dark grounds, consume a very large quantity of this black. Great solidity may be given to works of this kind, by covering them with several coatings of the fat turpentine, or golden varnish, which has been mixed with lamp black, washed in water, to separate the foreign bodies introduced into it by the negligence of the workmen who prepare it After the varnish is applied, the articles are dried in a stove, by exposing them to a heat somewhat greater than that employed for articles of paper...”

TO MAKE A SUPERIOR LAMP BLACK.

Suspend over a lamp a funnel of tin plate, having above it a pipe, to convey from the apartment the smoke which escapes from the lamp.  Large mushrooms, of a very black carbonaceous matter, and exceedingly light, will be formed at the summit of the cone. This carbonaceous part is carried to such a state of division as cannot be given to any other matter, by grinding it on a piece of porphyry. This black goes a great way in every kind of painting. It may be rendered drier by calcination in close vessels.

The funnel Ought to be united to the pipe, which conveys off the smoke; by means of wire, because solder would be Melted by the flame of the lamp.

Posted on February 24, 2014 and filed under adhesives, decoration and art, fire.

There's More to Fire Than Heat, Fuel and Oxygen (or, Fire Exists Within a Sphere of Changing and Interdependent Circumstances)

Fire is an interaction between Heat, Fuel and Oxygen completely dependent on proportions, conditions and physical relations. It is not a self controlling, self adjusting system created to serve us; no, that it is not. What fire really is, is a sometimes beautiful, sometimes terrifying expression of physical laws, chemistry and energy which can serve us without intention or harm us without malice. Fire is the product of a universe which we can understand functionally and work with; one which does not judge, reward or punish.

By Steven Edholm

Hey all you pyros!  I wrote this a while ago.  I was going to take some relevant pictures and make it more of a tutorial, but I think it stands pretty well on it's own and video might just be a better format to explore some of the details.  So here it is in all it's theoretical, abstracted glory.

We've all heard of the three things it takes to make a fire… HEAT, FUEL and OXYGENWhile it’s true that these are essential elements of fire, it is also true that without a fourth and equally important requirement there is no fire! Understanding this fourth requirement is key to effectively starting, controlling, utilizing and maintaining fire.  It can be understood both logically, and intuitively through experience.  It is the underlying and unifying principal of fire and no more or less dependent on the other three elements than they are on each other.   And what is the secret ingredient?  Drum roll please:  The secret is simply the sphere of circumstances in which the heat fuel and oxygen exist, which allows the chain reaction to continue or vary in quality.  Put more simply, we have to put heat, air and fuel together effectively to make fire happen and continue.   And then, to expand a little further, how heat, fuel and oxygen are put together, the condition each is in, and the quantity of each affects the characteristics of the fire.  Simple?  Basically yes, but it is still something of a journey from that simple idea to effectively maintaining and managing fires for various uses.  When you factor in the many circumstances which contribute to or detract from this chain reaction and consider that we want different types of fires for different purposes it becomes less simple, but then so much more compelling!  Join me in exploring a few details of this sphere of circumstances, because it is the details, some of them minute, that make the difference in how (or even whether) a fire burns.

There is a model that is use to explain fire called the tetrahedron of fire.  It is a 3 dimensional pyramid with 3 sides and a bottom.  The three sides represent one each of heat, fuel and oxygen.  The bottom represents an uninhibited chain reaction, or the fourth element.  This fire model used to consist of only three parts, fuel, heat and oxygen, represented as a one dimensional triangle, but it was modified to represent the fact that fire does not exist without the proper relationship of the three tangible elements.  Thus, the tetrahedron roughly represents what I am trying to tell you, which again is that fire exists and varies within a sphere of changing and interdependent circumstances.  However, the tetrahedron model is so simple that it begs description and actually communicates nothing without additional information and explanation.  I suppose that the series of articles I hope to write, and of which this is the first, will partly be that explanation and information from a practical standpoint, and of use to laypeople like us.  I would like to see a fire model communicate some practical details, but my attempts to make a better model or diagram have been a fail.  I suppose that the simplicity of the tetrahedron model may sometimes be an asset as it does not describe any one of the many types of fire.  On the other hand the model is unable to communicate in any way the manner in which a fire functions and far too little about how it can be modified and controlled toward practical ends.  I find that the tetrahedron model has little practical use here beyond what I’ve already discussed.

HEAT, OXYGEN AND FUEL DOES NOT ALWAYS A FIRE MAKE:  When I was 20 something I was on top of maintaining fires at public gatherings and such.  Now I'm inclined to sit back and let some eager, enthusiastic youngster do the job…. but they often don’t, which kind of sucks.  I still often find myself raising my creaking, cold butt from the lukewarm side of some smokey waning fire to go fumble around in the dark for some firewood.  If I'm patient or stubborn enough to wait for someone else to get up to add wood to the fire or, often more importantly, make adjustments to the wood that is already in the fire, my patience is not often well rewarded.  Frequently, the poorly selected (… if selected isn't even just too strong a word to use lol) wood is added haphazardly or with an evident lack of understanding.  All too often the new wood is somewhat randomly thrown on often creating more problems than there were in the first place.  Kids today… sigh…  Adding more fuel to the fire or just blowing on it does not fix everything.  Fire is an interaction between Heat, Fuel and Oxygen completely dependent on proportions, conditions and physical relations.  It is not a self controlling, self adjusting system created to serve us; no, that it is not.  What fire really is, is a sometimes beautiful, sometimes terrifying expression of physical laws, chemistry and energy which can serve us without intention or harm us without malice.   Fire is the product of a universe which we can understand functionally and work with; one which does not judge, reward or punish.  Understanding a little fire theory can go a long way in enabling us to create, control and influence fire.

No, fire is not just Fuel, Heat and Oxygen, but in a very real way it is a product of specific relationships between those three elements which allows them to undergo the continuing chain reaction of combustion.  Lets look quickly at some varying conditions:

*If you have the heat of a match a foot away from some well sized and placed fuel, even with oxygen all around in the air, you do not have fire.

*let us say that you have a big round log being heated with a propane torch while surrounded by air.  Thats a lot of heat, and plenty of air, but in most circumstances the log on its own will not really flame a whole lot, it will more likely smolder and eventually go out after the heat is removed.  If we add another log or some smaller fuel, in the proper spatial relationship, our big round log will burn more quickly,  more thoroughly and longer, basically because of the interaction of the burning fuel units with each other.  They heat each other and bounce heat back and forth.

*If we have a healthy fire burning away and add a quantity of very green moisture laden wood, the fire will falter and slow down mostly due to the effect of the moisture on the factor of heat.

*Throw a bucket of water on the fire and so much heat will be removed as steam to heat the water that the fire is likely to go out completely.

*Cram the logs in a fire too close together or smother it with dirt and you will not have enough oxygen for a healthy blaze.

*Move the logs too far apart from each other and they will not contribute to a mutual build up of heat between them and are likely to smolder and each may eventually just stop flaming, begin to smolder and eventually just go out.

 All of the above examples illuminate the importance of specific relations between the three concrete elements of fire.

Fires have almost living characteristics.  Like a living body, fires that we use to our ends often need attention and feeding to achieve certain goals.  Maintaining and using fire effectively is all about details and the details that make a very functional fire can be very subtle and minute.  No one really taught me to use fire properly I learned by immersion.  The lifestyle I chose demanded that I understand combustion enough to maintain an acceptable level of functionality.  If I couldn't make a fire quickly with damp wood I wasn't going to finish cooking dinner before dark.  If I managed the fire poorly every night I was going to wake up with sore eyes and a woodsmoke hangover.  By the time Mors Kochanski introduced me to the tetrahedron of fire model I already understood it functionally, but had never put it all into place with symbology.  I ultimately can't teach anyone either.  Understanding fire functionally and not just theoretically is a personal journey.  I can maybe start the fire for someone, but their enthusiasm, action, intention and maybe most of all need to keep that fire going, are what will ultimately create a functional understanding.  Fire is fascinating to all people on some level, but most modern people do not find enough use for it to manifest a good working knowledge.   If you want to understand fire functionally and stay in practice, there is no better way than to place yourself in a position of need on a regular basis.  Start fires regularly, and start them from scratch never using paper or accelerants.

The simple but important information I've just presented above forms the foundation of a good working relationship with fire.  Whether you are starting, managing or putting out fires, you are ultimately balancing or working mostly with the following concepts:

FUELS

*Conditions (wet, rotten, dry, warm etc…)

*Structure (dense, pithy, liquid, gaseous, etc…) 

*Composition (Lignin content, chemistry, growth rate, environment, species etc…)

*Sizes

*Shapes

*Spatial distribution (relation of fuel units to each other and to heat source)

*Flamability

AIR

*Access or lack of

*Heat generated drafts

*Air temperature

*Air density

HEAT

*Temperature

*Radiation

*Proximity

*Reflection

*Blocking

*Placement of

I know that information is rather abstract, but you don't have to be a total dorkus like me and memorize it all or anything!  I'm just using the theory to plant seeds that can lead to a functional and intuitive understanding of fire, because that is really where it's at.  When there is an impetus to learn, and these basic ideas are presented in context, people's ability to manage a fire rises very rapidly, within minutes actually.  I've seen this happen over and over when playing fire chess with students and friends.  I hope to write more in this realm and put theory into context with either videos or more blog posts, so stay tuned.

One last thought, its easy to get cocky about ones understanding of fire.  The truth is though that the factors which contribute to a given fire burning or not burning are complicated and not always easy to predict.  However well we think we know it, fire can sometimes surprise us.  Considering the often horrific consequences of uncontrolled fire, it is best to follow the precautionary principal when it comes to safety, and err on the side of caution.

Have something to add?  Did I miss something important?  Leave a comment.

fire

fire

Posted on January 26, 2014 and filed under fire.

About Leg Rolled Cordage, and Why You Should Learn it.

For many years, Tamara Wilder and I would teach leg rolling at our classes and at various primitive skills events.  We were real excited about it and started to see the usual hand twisting taught by most books and  instructors at the time, as sort of grade school level cordage making.  Leg rolling was slow to catch on for some reason, but it now seems to be more common, as it should be.  This short post is about leg rolling as compared to some other methods, and why is it worth learning, even if you don’t use it all the time.

Tamara demonstrating leg rolled cordage at the Oregon Country Fair

Tamara demonstrating leg rolled cordage at the Oregon Country Fair

For making cordage without any props or gizmos, leg rolling is the worldwide norm.  It may have been slow to catch on in the primitive skills scene, but it seems almost universal among traditional cultures.  Leg rolling is common because it’s fast.  The cord is rolled on the thigh or calf with the flat palm, usually in an up and then down motion. With a little set up, a push down the thigh with the flat hand, and a pull back up the thigh, you’ll usually have 5 to 6 inches of cordage or so.

Almost everyone who already makes cordage is familiar with the hand twisting method, often called reverse wrapping, where the twists in a cord are made one at a time.  Reverse wrapping is useful at times, good to know, and a good way to learn about cordage, but it is pretty slow going!  We also use a method I came up with which we call mouth twisting (or I think that’s what we call it.  It's kind of a dumb name).  Mouth twisting is a little faster than reverse wrapping, but it is not as fast at leg rolling, and it can make you cross eyed, looking down at the cordage right in front of your nose, so it’s not very pleasant work, though I still use it quite a bit for certain applications.

Speed may not be that important to someone just dabbling a little in paleo arts, but when some of us started to do larger projects, like nets, belts and ropes, reverse wrapping was just not cutting it.  Imagine making a hammock, that might contain a 1/4 mile or whatever ridiculously long length of cordage, by twisting each and every twist one at a time for, what?  a year?  two years?  No thanks.  Leg rolling is the next level, and takes cordage from hand cramping novelty status up to a level where it can have a place in a subsistence paradigm.

Tightness of twist:  Many years ago,  I made a batch of slings, the kind for throwing rocks, with buckskin pouches and dogbane cords.  Having a disease somewhat approaching perfectionism at the time, I wanted to make those strings super duper nice and tight!  I used the mouth twisting method, which can be used to make very tightly twisted cord.  I figured that if the cords where under great stress and possibly some twisting and untwisting action while the sling was in use, I’d better make them really "good".  I was used to making necklace cords this way and they lasted a long time.  So I made them SOOOO NICE!  The were thick, immaculately spliced with no tag ends and the fiber added very gradually so there were no weak spots.  And boy were those suckers tight.  They were perfect(ish), looked great and the strings broke when they were used.  I was like wahhhh!?!?!???  The strings were so tight it turned out, that the fibers were not able to move freely and were basically cutting each other when under stress.  I had another sling which I'd made with much thinner looser dogbane cord and a coyote scalp pouch, which never did break in spite of considerable use.

Occasionally it’s nice to have a very tight cord.  You can make strings tight by reverse wrapping, or mouth rolling, but not so much with leg rolling.  I used to think that the looser cord produced was a major drawback to leg rolled cordage, but now I see it differently.  Unless the cord is extremely loose to the point where it may actually pull apart, or so loose that it’s prone to tangling and snagging, there are actually very few uses where you even want really tight cordage.  If you do need string that is ever so tight, then it’s usually only in short lengths, so you can afford to use the slower reverse wrap or mouth methods.  Overall, a somewhat slack cord is probably a little more utilitarian.

leg
leg

I don’t have time to turn this into a how to novelette on leg rolling, but I was just working on the Paleotechnics cordage book.  I made up a new batch of pine soot ink to do book illustrations, of which there will be many in that book.  Said book has been in progress, or languishing in a corner of my computer for many years, so no saying when it will actually be finished.   It'll be good when it is finished though, promise!

Leg rolling is still best learned in person, though the youtube videos I plan to record eventually will be a close second.  Fire, cordage and stone tools, along with knowledge of the plants and materials used to make them, form the foundation of basic technology.  If you have a chance to learn leg rolling in person at an event, or from a friend, do it.  Once you know how to do something, no one can take that away from you, and this is a skill that has been pandemic to our human family for good reason.  Finally, it's one thing to know how to leg roll cordage, but to get really good at leg rolling, the best approach is to undertake a large project that requires 50 feet or more of cordage.   Then you'll be rolling out cordage like a spider.

Happy twisting!

Posted on January 12, 2014 and filed under cordage, Fiber.

How long does it take?

manson bill By Steven Edholm

Yay, winter solstice it here!  That means we can all work more as days get longer!  huh?  “That must be a lot of work”.  “How long does that take?”  These are questions we commonly encounter here at Paleotechnics.  They aren't always irrelevant questions, but they generally hint at something pervasive, and often destructive, in our society.  The answer is never simple.  The truth is that we usually don’t know, and we usually don’t pay much attention.  The society we live in, and the way we do work, are all about quantifying.  If we work longer, we get paid more.  We walk around constantly judging activity and categorizing it.  There is work, and then there is life, and activity is either leisure, or profit motivated.  Working for acquisition of the symbol called money is particularly conducive to fracturing our lives into parts and assigning different types and amounts of value to them.*

But there are other ways to think about the things we do.  My friend and artist/craftsman/doer/maker Scott McGrath had a bumper sticker made once that said "I'D RATHER BE WORKING".  Almost anyone who has tackled a big project requiring intense concentration, whether it’s a hobby or for money work, knows the feeling of losing perception of time for a while.  I experience that feeling quite a bit.  Whether I’m cracking walnuts, tying sage bundles, or paring artichokes to make canned artichoke hearts, I look up after a while and realize I was in a mode in which time didn’t matter.  As long as you don’t need that time for something else, why keep track at all?  And who cares how long it takes?  But we are conditioned to constantly judge activities and value some over others.  We have come to have a strange relationship with what we call “work” and are also constantly encouraged to relish and enjoy our leisure.  But, if you live passionately and work to get things which are important in your larger scheme done, those lines begin to blur.

There are plenty of jobs I don’t totally relish, but I find that if the things I do are generally in line with my overarching passions, interests and goals, and I’m feeling relatively healthy, then labor is a pleasure.  And that labor of some kind, big or small, is what I want to be doing with most of my time, and what makes me feel good.  Meaningful work is one of the cornerstones of a satisfying existence.

The social and media forces that influence us are very powerful.  I don’t want to minimize them, and I don’t want to ignore the fact that we do what we do largely because of who we are and how and where we find ourselves.  But in a very real way, no one forces you to take a job you don’t like, or live life in a certain way.  You don’t have to live the way other people do, hold their values, or possess the things they possess.  You don’t have to spend your leisure time like other people do.  You don’t have to “relax”, or "party", or do “nothing” when you are not working.  And you don’t have to divide your life strictly into work and leisure activities.  “Work” is life, just like everything else.  Some of it is enjoyable and some of it isn’t.  But we don’t always necessarily have to judge it and categorize it ahead of our actual experience of it.

We can’t buck the whole system, but we can come to recognize the areas in which modern life, with it’s work/consume cycle and the fracturing of our lives into compartmentalized parts of work v.s. leisure, can cause disharmony.  With awareness comes the ability to act on our own behalf.  We can take ourselves gently by the shoulder and point us in new directions that reintegrate the parts of our life, where activity may just be activity and enjoyment and satisfaction are where we find them.

Disconnecting yourself from messages that indoctrinate you into the work/consume cycle and reinforce the fracturing of your life is helpful.  We are all susceptible to advertising and popular culture, no matter how aware we are.  It’s just simple programing.  Almost no one can escape it completely, but we can minimize it.

Try observing how you judge and categorize your activities unnecessarily, and how it affects enjoyment of them, or especially your ability to get lost in activities in a relaxed way.  What is your internal dialogue saying about the different things you do?  What judgements is it making that are coming out of someplace besides a pure, unpolluted motivation that you can understand emotionally?  If you really truly hate something you do and can't find a way to integrate it harmoniously into your life, maybe it's time to look at changing your life around.

Losing awareness of time, frenzy and resistance to simply become your activity for a while, whether it is oriented toward money or not, is a nice place to be!  Then maybe when you show someone your impressive project and they ask “how long did it take?” you will feel the irrelevance of the mindset that constantly feels the need to quantify everything in order to find a value for it that is, upon close examination, basically arbitrary.  An integrated life of love and passion, where activity of all kinds stem from a harmonized motivation, is going to be more relevant and satisfying than the constant, neurotic crazing of life and the world into value based on an arbitrary and constantly shifting quantification.  This isn’t a discreet model or place we can reach, but a philosophy of approach that we can reinforce and grow toward with awareness and intention.  By stepping aside for a minute and viewing ourselves and others from an outside perspective, we can cultivate an awareness of the ways in which we have come to embody those potentially de-harmonizing aspects of consumer society, and point ourselves in new directions.

512px-Makah_Indian_Basket-Weavers

http://www.youtube.com/watch?feature=player_embedded&v=21j_OCNLuYg

*Not to dogmatically reject money.  It has it's advantages and, regardless of anything, it's probably not going to go away anytime soon, so we'd best learn to live with it for now.

Posted on December 20, 2013 and filed under Philosophy.

Tetrahedron, Tetrashmeedron: Quest for the ultimate fire model

tetrahedron my butt header, fireBy Steven Edholm

"Ultimately, I think that where all of this analysis leads to is that..."

When I began writing the post,  There's More to Fire Than Heat, Fuel and Oxygen (or, Fire Exists Within a Sphere of Changing and Interdependent Circumstances),  I wanted a basic model to represent fire.  There is actually already a model commonly used to represent fire known as the tetrahedron of fire.  It consists of a tetrahedron of course, which is a pyramid with 3 sides and a bottom.  The three sides represent one each of HEAT, FUEL and OXYGEN.  The bottom of the pyramid represents the circumstances under which those three elements interact and is commonly referred to as a chain reaction.  The common explanation of the tetrahedron is that if you remove any one of the factors represented by the four sides, the fire ceases, which is true.  I have never felt comfortable with this common model, and indeed part of the impetus for writing that first article was to emphasize the importance, to my way of thinking, of the circumstances which allow, inhibit, and shape the character of, a fire; In other words, to draw what I feel is rightful attention to the bottom of the pyramid.  What I ended up writing instead, or before I got to my point, was the epic analysis that follows!  I decided that I better just cut it out and use it somewhere else.  Lucky you.

thanks Catawba Community College

I have a number of problems with the basic tetrahedron of fire model, but I think that many of them are due to my perspective as someone who has used fire quite a lot and would like to communicate information about starting and maintaining wood fires to other people.  I feel that from this perspective the tetrahedron model  doesn't emphasize the factors associated with an uninhibited chain reaction… or, especially, the actual means of controlling those factors to manipulate a fire into doing what it is that we want it to do.  In fact, being on the bottom with no real name, I feel that the fourth side of the tetrahedron is actually de-emphasized in the tetrahedron, although, you could see it as the foundation I suppose.  What I would like to see, is a model that demonstrates to some degree, visually as well as with a suitable name, the physical reality of fire.  I guess I feel that the tetrahedron is so abstracted and theoretical that it is not of immediate practical use to most people.  What I probably want is a model that is functional for fire users.  This model would show the interaction of the 3 elements of fire and emphasize that it is the chain reaction itself that is really the most important factor.  Yes its true that if you remove one side of the tetrahedron the fire goes out, but what of the complex interactions between the four sides which can cause a fire to burn, smolder or grow exponentially.

Fire is not a phenomenon that exists in a black and white world of burning or not burning.  Of course it can be reduced to that level of understanding, but that perspective is of limited use.  Rather, fire exists in a spectrum from the smallest smoldering spark to an inferno or even an explosion.  Even when wood is heated below the point of combustion it undergoes destruction.  Upon close scrutiny, what we really see is a spectrum with a few discreet, sensational points of especial interest, and not an all or nothing sort of situation.  In other words, the limited on/off switch simplicity of the tetrahedron model limits its usefulness in a qualitative sense.  When asked “what kind of fire” the tetrahedron simply says one that burns, or does not burn.  The other three necessary elements exist all around, but putting them together in the proper circumstances for combustion is much more rare.  I baked a pie today.  There was heat in the oven, the kitchen is largely made of fuel, and air is everywhere, yet the fire stayed in the oven.  Even the pie, in close proximity with a fairly energy dense flammable crust was just baked and not burned.  Having heat, oxygen and fuel does not necessarily mean fire.

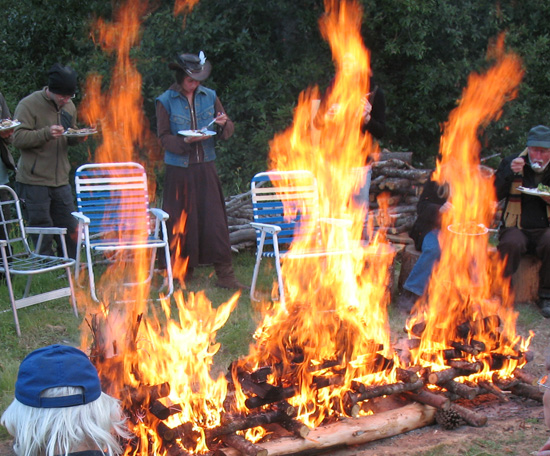
Where's the fire?

Now were talkin'

Where did the fire go?

The tetrahedron model doesn't say much to me.  I would like to come up with a model that is more immediately accessible.  Also, I mean accessible to all people.  Something that will say more about the process and requirements of fire at a glance with less need for elaboration.  This may be an impossible task if all forms of fire are represented.  The tetrahedron is simple enough that it doesn't specify anything and therefore can include all types of fires.  A model that is more functional might limit the types of fires represented, but in the interest of communicating information that might be useful to those who use, or would like to use, fire.

My main complaints with the standard tetrahedron are as follows

The fourth side doesn't have a name that really works.  It is usually referred to as the chemical reaction or the uninhibited chain reaction.  I've racked my brain (and plied the thesaurus) and the most descriptive word I can come up with is circumstances not very immediately understandable maybe and not very sexy, but…  Perhaps it needs more than one word?  At least circumstances leaves room for attributes of various individual fires  Either way it still begs description which is un-ideal.  I think being on the bottom also contributes to the minimization of circumstances in the tetrahedron model, and that feels wrong because circumstance is really what fire is all about.  To my mind the concept of circumstances should be at the center of the discussion and of the model because the other three elements are exceedingly common and even throwing them together haphazardly will not always yield fire.

The tetrahedron model doesn't foster any kind of understanding of what our relationship with fire can be as users.  It exists more in a theoretical framework where extrapolations have to be made, or much more data added, to understand fire functionally.  In other words, its hard to look at it and recognize anything.  It doesn't foster an understanding by its nature and says almost nothing on its own.

There is not even a hint at quantity in the model.  If I add more air the chain reaction is intensified.  If I limit air the fire may be either put out or it may be minimized.  It will die out with X amount of air in one set of circumstances and not another, and the same can be said for heat as well.  The variability of fire or its reaction to partial removal or addition of one or more elements is not represented.

A much greater grasp of fire can be had by understanding the spatial distribution of fuels, which the model does not address.  This goes for both the distance between fuel units (also dependent on fuel size and qualities)  as well as the vertical and horizontal alignments.  This point is much more relevant to solid fuels.

The behavior of the elements of heat and air are also missing from the tetrahedron model.  Draft, and the build up of heat between the fuel units, are crucial factors in understanding the behavior and manipulation of fire.  It would also be nice if our model could hint at this behavior.

All of the above hint at the concept that reactions of fire are complex and interdependent.  Change one element in quantity or quality and the others change as well.  An ideal practical model would represent in some way the interdependence and interaction between the three elements.

Maybe this is all too much to ask from a fire model!  I guess I have to give the tetrahedron a couple of points here.  It is kind of neato that there is this geometric model where  A, H & F each touch both of the other two and the bottom touches all three.  But on second thought, the chain reaction (oops, I meant circumstances), being less concrete than the others should probably be set apart as different than the other three and of course you already know I'm not happy about it being placed at the bottom as I feel this minimizes its importance.  The problem I've run into in trying to improve the model though is that if you separate the three it becomes difficult or impossible to draw the connections between the other three.  That is a place where the tetrahedron works.

Another possible merit of the tetrahedron is that it’s simple enough to include all types of fires… but… its too damn simple.  It just doesn't say anything.  Without explanation it's just a pretty shape, and you can explain what it's capable of actually showing in a few seconds.

The challenge in creating a useful fire model or diagram is to make it say something, and to communicate important information easily without confusion.  Some information may have to be left in the dust, and that's fine.  I want a model that can foster as much understanding as possible while still being functional and accessible.  I've tried to work on such a model, but so far I'm not very happy with any of the results.  In fact, I haven't yet decided whether they are even an improvement at all.

Ideally the model would represent:

draft… the crucial fact that burning things and rising heat draw more air into the firesphere.

The focal areas of heat that build up between fuel bodies and how this interaction perpetuates a fire.

The effect of the relationship between fuel sizes and the distance between fuel units on combustion.

fire as a product of the interaction of the Heat, Fuel and Oxygen and the fact that this interaction is widely variable depending on the circumstances.

Ultimately, it would actually require many diagrams and much explanation to show the more practical everyday physical realities and concepts of fire, but it would be nice if one primary and more encompassing model showed something immediately useful other than “it takes these three things to make a fire”…. and then as an afterthought, “oh yeah, they have to be uninhibited”…. and “if you take one away it stops”.  What about "if you take some of this away it slows down but doesn't stop"?… or "if you add more it goes faster"?

The quest for a better fire model may be a lost cause, and for now, I've given up.  I think my main beef with the tetrahedron is subjective, and simply that it seems to infer less importance to the things that really matter in practical fire applications; the things that I’m always trying to communicate to people as very important to working understanding of fires, and which I can see that many people have a poor grasp of.  Ultimately, I think that where all of this analysis leads to is that an actual fire makes the best model!  Imagine that!  I mean it's interactive, three dimensional and fun!  Perhaps we can only learn so much with two dimensional models, and will never understand fire by surfing the internet.  With a fire in front of us, and a little nurturing by someone competent with fire, a rapid understanding of the circumstances of combustion is possible.  And I’ve seen this over and over again when playing fire chess.  Immersion is generally the best teacher.  Put ourselves in circumstances which require competence and competence is fostered.  Hey, stop surfing and start burning!

http://www.youtube.com/watch?v=3UmC6acEHk0

Posted on December 8, 2013 and filed under fire.

Roasting Bay Nuts in a Popcorn Popper

roast bay nuts header

By Steven Edholm

NOTE:  Bay nuts must be properly roasted to be edible to humans.  In spite of our best efforts to the contrary, we still commonly encounter people who are not roasting their bay nuts properly.  Most commonly, the nuts are not dried before roasting.  The second most common problem is roasting too cool.  The toxicity of unroasted bay nuts is unknown, but they are probably not good for you.  A tickling irritation in the back of the throat, almost like a burning sensation, is indicative of inadequate roasting.  Please read and follow directions.)

Bay nut season is early this year.  I usually find myself harvesting them around thanksgiving, but they’re dropping all over the place and have been for a while.  Roasting bay nuts in an oven is tricky.  They require very frequent stirring and because it is only practical to stir the nuts every 2 to 3 minutes, they often roast unevenly.  It has always been my feeling that the nuts should be kept in more or less continuous motion in order to roast more evenly, just as when roasting coffee.  I’ve even thought about approaching a coffee roasting company to see if I could try using their equipment, or maybe  building some type of makeshift roaster that would keep the beans moving constantly.

Last year we acquired a popcorn popper here at Turkeysong for roasting coffee beans.  This is the type with a crank handle on top and a wire inside that stirs the popcorn.  They work really great for popcorn and roasting coffee beans.  I’ve used it a number of times now to roast bay nuts, and it seems to work really well.  At this point I'm fairly well convinced that it works better than the oven.  A reader also contacted us recently saying that he has been using one too and liked the results, so I think we’re all on to something.

Here are some thoughts and observations on using the popper.  Don't forget to roast dried nuts only (that means the nut inside the shell is dry and somewhat hard, not rubbery or flexible).

*Stir the nuts constantly.  The burners on my small stove are weak, but it still seems to get extremely hot in the popper.  I think it's good to tone it down a little as the roasting progresses.  I start on high, (which is not that high on my stove) then turn them down to medium, or medium low at around 6 to 7 minutes when they are really starting to roast and smoke.  They should still roast hot for the finish, and should still be smoking lightly to moderately the whole time .  With my set up, roasting a pint in the popper takes about 13 to 15 minutes.  Don't use that as strict guideline, but you see what I'm getting at.  It is important not to roast too cool.  Our observation so far is that a high temperature really seems to help in driving off the volatile constituents that make bay nuts inedible when raw.  If it takes under 12 minutes, you're probably running a little hotter than you need to.  If it takes over 15 minutes, you're probably running a little cool.

*Once the nuts are nearly done, they finish roasting (or burning) extremely fast!  The difference between roasted and burnt, may be less than a minute.  This is one reason I like to turn down the heat a bit, in order to have a longer window for deciding when they are done.  Either way, check the nuts very frequently by cracking one open to observe the color, and remove to cool in a basket as soon as they are done and not a second longer.  Color can range from light brown, like coffee with a little cream, to dark brown.  If not roasted enough, they the volatile oils will tickle and irritate the back of your throat.

*How many nuts to roast at once?  I’m still testing out this factor, but for now I’m sticking with about a double layer maximum.  In a big popper, that’s actually a lot of nuts.  For personal use, less than a full layer is still going to be a lot of nuts.

*The poppers vary a great deal in build quality.  The one we have at Turkeysong now is a stainless steel unit called... are you ready?  The Sweet and Easy Snack Machine.  The build quality is very good.  It is heavy gauge stainless.  The lid can be a bit of a pain to take on and off, but otherwise, I’m fairly happy with it.  If you want a quality popper to use for popcorn and coffee too, I guess I’d recommend it, but with some reservations.  If you read reviews on amazon, not everyone is happy with this unit.  Most of them are aluminum, which is not very suitable for direct contact with food like popcorn and coffee beans scraping around in the bottom.  But, if you have a cheap aluminum one already, or can score one at a thrift store or yard sale, I’ll bet it’ll work just fine for bay nuts in the shell.
sweet n easy snack
sweet n easy snack

*The process makes a ton of smoke!  Turn on the vent if you have one.

*Remember to observe some basic rules of roasting bay nuts.

>Dry the nuts first!

>Roast in the Shell

>Roast pretty hot, should be smoking a fair amount

>Test frequently

>Roast small quantities to use soon, and keep the roasted nuts sealed in a jar to prevent staleness.

roast baynut macro
roast baynut macro

For more on baynuts see Baynutting.  Follow us on facebook to stay informed.

Posted on November 10, 2013 and filed under food.

Antler v.s. Bone: A contest of context.

By Steven Edholm We like to see things as black and white, good or bad, better and worse.  It helps us function in daily life where we need to make fast judgements or live on cruise control without having to over analyze everything.  But it is also a trap that can limit us and cause us to do really dumb stuff.  It helps to look at things in context.  We can pit antler against bone to see which one is better for tools and such, but the victor will be dependent on circumstance and what it is that we are trying to accomplish, rather than on more arbitrary grounds.  Both Tamara and I have largely gravitated toward espousing and detailing the qualities of materials as a way to view paleotechnics.  While our feeble minds may gravitate toward one or the other as superior, redwood is not oak, soapstone is not jade, antler is not bone, and none is superior to the other except in the context of specific uses.  Bury an oak fencepost and it will probably fall over in 5 to 10 years, where redwood may last for 50 or much more.  Make a bow out of redwood heartwood, but in spite of your best design efforts, it’s just going to be kind of lame.

Some bone and anlter objects.  The hoop in the center is elk antler thinned by scraping with stone flakes.  Bottom is a bone handle for a dry hide scraper of chert stone.  top right is a handle for a stone scraper with relief carving.  top left, is an antler pressure flaker bound to a wooden handle.  All of these items are made with primitive processes.

Bone and antler are similar materials.  The qualities of both can vary quite a bit, but they are still very different.  bone can be more or less flexible depending on many factors, like what part of the animal, what species, age etc.. but antler is, by it’s nature, generally tougher and more flexible than bone.  Some uses of these two materials will overlap, while for others, one is clearly superior to the other.  Keep these thoughts in mind as I’m speaking in generalities here.

Bone is harder than antler as a rule but, like many hard things, it is also more brittle and less likely to survive impacts, bending and twisting. However, being harder, bone also takes a better edge.  It’s not going to sharpen up and hold an edge really well, but better than antler. Bone is more liable to check and crack in drying.

Antler is softer and tougher as a rule.  It can be more easily bent (though major thinning is still usually required).  It will not hold an edge as well, but then it also won’t snap as easily.  When used to pressure flake arrow points, the stone dents into antler easily providing a ready grip.  Sometimes that’s good, and sometimes the harder material of bone is better used.

Antler earrings.  These could be made of bone, and I've made a lot of bone ones, but antler is less likely to check, or crack under pressure.

Think about it.  An antler is made to clash with other antlers in violent conflicts.  Bucks slamming into each other with tremendous force, and then twisting and throwing their full body weights around by the antlers on their heads.  I was awakened a month ago in the middle of the night by two bucks going at it down in the woods.  Believe me, they are not messing around!  It’s no wonder antlers sometimes break off during these fights, but they usually don’t.  Antler can almost be viewed as a very hard and tough wood, though it probably exceeds all woods in these qualities.  Bone has to be tough as well, but not as tough.    Green bone is much more flexible than dry bone.  Bones didn’t evolve to be tough after we have died, just while we are still using them.  Antlers didn’t evolve to be tough after the bucks are done with them either, but they are tougher than bone to start with and still tougher than bone when cast off.

The material from which the two are made are different.  Antler contains a great deal of collagen and is more related to skin than it is to bone.  Over cooking it will result in a loss of collagen.  That’s great if you’re making glue, but not if you want a strong piece of antler.  bone will also weaken and dissolve glue making substance into the water when cooked, but it will lose that substance more slowly.  My general tendency is to think that cooking either one as little as possible is ideal, though weathered bone, which has lost much of it’s glue substance, is sometimes very flexible, so I try to keep an open mind on that one.

Antler is good for pressure flaking tools, bent items, stone working batons and handles.  It is easier to carve and work with, especially when soaked in water overnight.  If thinned evenly and enough, it can be dropped in boiling water to heat it through and then bent into a pretty tight radius without cracking.  It usually has a spongy pith that softens on soaking and heating.  Other items, like blades, can be set into the soft pith, which then hardens on drying gripping the item tightly.  Antler, being soft and somewhat fibrous, can't take as good a polish as bone, and the polish is as lasting.

Bone is better for edges (though not comparable to a good edge stone like flint) and tools that need to stay sharp, like an awl, it can work well as a pressure flaker depending on the circumstance.  Think arrowheads, harpoon points, hide scrapers and stuff like that.  Bone sometimes has as spongy looking core which can be useful as a paintbrush for painting on skin, but it's pith doesn't have the same qualities that allow antler to hold onto things like knife blades firmly.  Bone can take a very high polish.

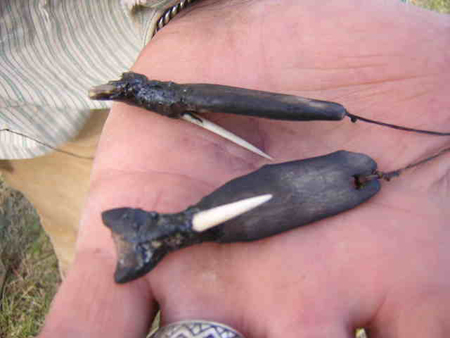
These fish hook/lures with bone points were made by someone at the Rabbit Stick Rendezvous.  If I had to guess I'd say it was Goode Jones or Patrick Farneman.  Antler would not serve quite as well.  It would be tougher, but would soften in water, and not take as keen of an edge as bone.

I hope this short article leads to a better understanding of the qualities and potential uses of these two useful and beautiful materials, and that I didn't forget anything important.  When we understand the qualities of the materials in our world, it leads to a wide open potential for creative, adaptive responses to our needs and desires in interacting with our environments, and that is what paleotechnics is all about.

Posted on October 28, 2013 and filed under Animal Parts, materials, tools.

Fire Chess: A fire learning game

firechess header One night at Glass Buttes Oregon (or day, or something in between), I was sitting by a fire with Tamara, Margaret Mathewson and Jim Riggs.  I’m sure there were other people there too, but I remember those guys for sure.  The fire, and how it was or wasn’t being managed, was a common topic in those days.  All of us were inclined to be geeky about fire, and we all used it enough to have a strong working knowledge.  We were observant and critical when someone added wood or adjusted the fire.  As fire enthusiasts, that kind of geekery was our idea of fun, but it was also serious to us.  Like if you put a bunch of chefs together and they’d be eyeing each other cooking and saying like “dude, that’s too much anchovy” and stuff like that.  It was all good humored, but this wasn’t just “lets geek out and be funny and nerdy”, it’s what we did.  And if you do something a lot and are good at it, you care, you notice details and you develop opinions.  None of us wanted to sit around in the smoke, or be cold, so the fire should be done right.  It was the focus of camp life and not to be accepted in just any old state that it happened to be found in.  Fire does not tend itself all that well, and tending is a matter in which attention to detail yields great returns in results.  Inattention, on the other hand, generally leads to discomfort, annoyance, cold food, burnt food, tearing eyes, cold butts or moving of chairs closer and farther from the fire. So anyway, we were all sitting around flicking each other crap about where the wood should be put and how, and what about that smoking end there, or Jim with his “upward focus” and me with my parallel fuels, and fire chess was born.  Someone was probably like Ok, that’s fine I guess, but If you do it this way that smoking end is dealt with.  And someone else was like hey, it’s my turn, and eventually it coalesced into a set of simple rules.  Each person gets a turn in rounds to either add a piece of fuel, or make one adjustment.  After each move everyone else analyzes the move and makes comments.  We thought that was fun for a while and used to play it occasionally when nothing else was going on and we were sitting around the fire, which was fairly often.

GB03fire2

What I noticed though was that when new people unversed in the ways of fire tending were around, they picked up a great deal of understanding extremely fast.  So Tamara and I started using fire chess in classes, and sure enough, people went from fire losers to fire cruisers in no time.  Most people haven’t grown up around open fires and don’t understand how to manage them to desired ends.  Further, it often seems that it barely occurs to them that management of the fire beyond tossing some wood on every once in a while is worthwhile at all!  That’s Ok, we all have to start somewhere and we are what we do. One of the first campfires I had to start on my own, I used an entire candle's worth of wax, dripping and relighting to get it to finally start burning.  I had damp wood to work with, and I just did not understand how the system worked.  It was somewhat sobering just how lame I was in that capacity, and I started paying attention.  I soon put myself in the position of needing fire everyday for cooking and various other things, so I was forced to perform, but it was a gradual process.  I believe that fire chess works to quickly foster an understanding of fire starting and management for two basic reasons.

The first reason is that there are frequent and specific opportunities created for comment and feedback.  Feedback from both instructor/mentors and from other participants is frequent, but it is tied directly to actual results and occurrences second by second.  Fire reacts quickly in many cases providing dramatic lessons in a short period of time.  The results, positive or negative are visual and often immediate.

The second reason, and maybe the most important, is that participants are invested in the results.  They are paying close attention because someone might screw up their move, or make the move they are planning.  If someone does something that works well it’s noticed and commented on, which drives the point home so it sticks.  When the players turn comes they can build on what has gone before and they want to do well in the eyes of the group.

A few tips for instructors

*Start with a short discussion about the four elements of fire- heat, air, fuel and the relations and interdependence of those 3 tangible elements.  The less tangible fourth element of fire, how heat, air and fuel are in relation to one another, is what fire use and management are all about, so drive that home.  Upcoming posts should deal with that subject in depth.

*next a short discussion asking “what makes a good fire?”  This opens the mind and leads inevitably to the conclusion that there is no one good fire and that fires are managed for different uses.  Sometimes we want just smoke and no flame, and sometimes we want no smoke at all, more heat, less heat, different shapes, etc...  You can still play the game as if you want no smoke and to be comfortably warm.  The understanding gained by playing for a clean fire is the most generally useful and can ultimately foster understanding of the management of other types of fires as well.

*It’s not “all good”.  Sometime in the 60’s or 70’s criticism became uncool, everyone was doing their best and everyone got an A for effort.  The good and relevant points which began as that message are largely lost and the residue we are left with is a dogma that can hamper achievement.  Be critical.  Don’t be mean, that’s not constructive and it’s not the point.  Critical and mean are not the same hat.  If you have opinions, let them out and encourage others to do so as well (and don't use upspeaking when you do it!).  Constructive discourse requires analysis of information, formation of ideas and opinions, and expression of those opinions, along with the open consideration of the opinions of others.  It can be argued that everyone is doing their best under the circumstances, but the circumstances can change and constructive criticism can be an important part of that evolution.  Don’t be stingy with praise either.  Positive reinforcement works.

*If you are the teacher and think you know what you’re doing, stand back a little and let people learn at a comfortable pace.  You might be surprised how little prompting  is required by you.  As long as basic goals are understood and held in common, progress can be rapid even with people totally unfamiliar with fire tending.

*Start small since fires grow fast when constantly fed.

*Sized and types of fuel are as important as placement and maintenance, so have a mix of fuel types and sizes.  Dense long burning woods, dense fast burning woods, light fast burning woods, woods that throw sparks, woods that don’t throw sparks, woods that tend to smolder, woods that make long lasting coals, some bark, some leaves, etc...  Fuel type is important and having all types of wood will open windows for education.

*Mix all the woods together in a pile.  Throw in some inappropriate wood.  Nothing toxic, but a few chunks of pitch wood, some very punky wood and some green wood could be instructive.  Very few novices will notice that wood is green, but the seasoned will usually notice at first heft.

*Don't allot much time for fire chess, because it doesn't take long, and the fire will just get too large pretty fast.

What started as a natural pass time among fire nerds, developed into an effective learning tool.  Fire chess, in spite of the name and the critical element of the game, is not very competitive.  Everyone has the same goal, so cooperation is more common than competition.  If anything the competition is with the self, to understand more and function better.  For people who teach long term classes in outdoor living, you’ll find that after just a game or two of fire chess, the campfires will be managed much better for the duration of your time together.    It is also a good item to throw in a one day class about fire. Lessons learned are not limited to tending fires, but lend an understanding of the function of fire generally, including the important skills of starting them and putting them out.

note that

Posted on October 5, 2013 and filed under fire.

Hide Glue Part II: Glue making, the basic essentials

about hide glue headerBy Steven Edholm Making hide glue, is well within the reach of anyone with access to the necessary materials, and is a great addition to your skill set.  In part one I discussed hide glue in general, what it is, and some of it's strengths and weaknesses.  This article is a combination of personal experience and research into technical aspects of glue making.  Like most people,  I started my glue making career boiling down hide shavings and stray hock skins, without any further preparation.  Glue strong enough for many uses can be made with little care and marginal materials, but over time and with the input of  glue making professionals of the 19th and early 20th century, I found that a little care goes a long way toward making stronger, prettier and better smelling, glue   Here are the most important basic concepts and steps in making very high quality hide glue.

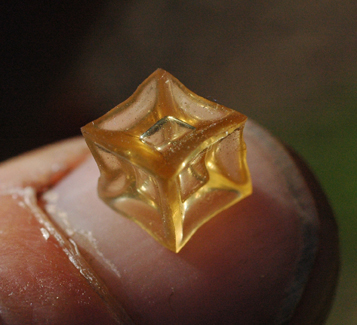
hide glue cube macro

Common materials for glue making are:  Skin (including fish skins), fish air bladders, sinew scraps, and antler.  (Bone can be used to make a glue, but it is harder to make and inferior to glue from the sources we'll be talking about.)   All share in common a large amount of a protein known as collagen, which is the basis of both leather and glue.  Hide glue is also sometimes known as collagen glue.

*Skin is easily accessible and easy to work with unless it contains a lot of fat.  It is generally best for the home producer to avoid very fatty skins such as pig, bear and raccoon.  The legs, and other tag ends trimmed from skins before tanning, are a good source of glue stock and were a staple material for traditional hide glue makers.  Fish skins can also be used,  but I don’t have any personal experience using them.

*Fish air bladders are supposed to make excellent glue, but they are not very accessible to most of us.

*Sinew makes excellent glue.  Be sure to collect sinew that is free of meat and fat, scraping it clean as necessary.  The sheaths that surround the tendons in the lower legs of browsers and grazers also make excellent glue.

*Antler, from elk, moose, caribou, deer, etc... contains a good deal of collagen.  The collagen can be difficult to extract, but reducing the size of the antler by grinding or slicing helps. It is important  to note that horn proper, from cows, sheep and goats, is entirely different.  Horn is an outgrowth similar to hair, and does not contain collagen.  Hooves are similar to horn and also do not contain any collagen (see part one for more discussion on that point.)

Previously frozen materials should never be used.

Dried material is preferred over fresh material.

Decayed materials should be avoided.

Ideal steps in Collagen glue making:

*Clean the material:  The very strongest glues are made with un-decayed and thoroughly cleaned materials.  Fats, muscles, dirt and other non-collagen materials are removed as much as possible before the material is boiled.  This can be accomplished by liming, or soaking in wood ashes, followed by thorough, repeated scraping and washing to remove dissolved solids and residual lime.  However, very strong glue can be made by boiling fairly clean materials like sinew and even skin from lean animals without undergoing so thorough a treatment.  At the very least though, skin should be very thoroughly fleshed and washed.

Many materials are best prepared by thorough dehairing, fleshing and scraping, much as for tanning.  Skins are also generally best limed or soaked in woodash to dissolve unwanted fats and proteins.

*Dry the material at some point before cooking:  All glue stock should be dried as some point before boiling.  If it has been limed, the stock should be dried after liming and before boiling to change the residual caustic lime (calcium hydroxide) into inert calcium carbonate (limestone).

Materials for hide glue are best dried before cooking.  This glue stock is carefully prepared bull hide.  It was limed and then scraped and washed very thoroughly to remove the residual lime and all unwanted material until very little was left except the collagen fiber network that is the basis of both leather and glue.

*Simmer the material in clean soft water:  If you have very hard water, buy some distilled water.  Just cover the stock with water.  Avoid scorching the glue stock in the pan.  Traditionally, a layer of straw was often used to line the boiling vessel to keep the glue stock away from the metal, so that it would not stick and burn.

This glue was poured off once and is being re-cooked.  The second batch is harder to extract thoroughly, and in my experience, seems a little less cohesive.

*Cool the resulting gelatin solution:  When the glue solution seems thick, cool a small amount in an egg shell.  When ready, it should set upon cooling into a firm, easily handled piece.  Pour the solution into a clean flat pan of some kind, to a thickness of 3/8 inch or less.  When cool, it should be easily handled when picked up with dry hands.  If not firm enough to handle, it will crack apart easily and maybe stick to the hands.  If too wet, evaporate it further in the sun or in a low oven until it will jell more firmly when cooled. If not fairly easy to handle, it will stick to the drying surface.

When gelled by cooling at room termperature, the gelatin should be easily handled.  If it breaks easily, it is either too wet still, or has poor adhesive power due to poor base material, or mishandling at some step.  If it sticks easily to dry hands, it is too warm, or too wet still.

*Cut and dry the gelatin before use:  When the glue is firm, but still cutable, you can dice it into small cubes before drying further.  Large pieces of glue are difficult to break apart for soaking.If firm enough, the gelatin can be dried on a clean cloth.  The glue must be dried in a cool area with good air circulation.  The un-dried gelatin will turn back into liquid if it gets too warm.  The drier the gelatin becomes, the warmer it can be without melting.  Glue has traditionally been dried on nets.  Glue dried during thunderstorms can be damaged by ozone and may melt.

Large sheets of glue are difficult to break up.  The smaller the pieces, the faster they will soak up when you are preparing the glue for use.

Glue can be dried on a clean cloth if it is firm enough not to stick.  This glue is almost finished drying.  A fan is very helpful when drying glue.  Just keep it out of sun and heat or it will melt and you'll be all &%^%$$#!!!

Note the deeply indented centers and sharp edges of these glue pieces.  That is a sign of quality.  What it indicates is that the adhesive power and solidity of the gel was so great that it could be firm while still retaining a relatively high water content.  A weaker gel would have fallen to pieces with so much water.

Now you have glue.  Skipping some of these steps such as drying the material before boiling, cleaning the glue stock thoroughly, or drying the gelatin, will result in a usable and sometimes even very strong glue.  However, all of these steps combined and executed properly will assure that you end up with very a very high quality product.  Glue is not the best place for sloppiness and procrastination.  Believe me.  Here at Paleotechnics, we’ve already made all these mistakes for you!

To drive home some of these points, here is what not to do!

*Don’t freeze the glue materials before boiling.

*Don’t use decayed materials.

*Don’t use greasy, fleshy or dirty materials.

*Don’t burn the glue material in the pot.

*Don’t let the boiled solution sit around and decay at all before drying it out.

*Don’t make, use or dry glue during lightning/thunder storms (ozone supposedly affects glue quality causing it to lose it’s jelling power.)

Posted on September 7, 2013 and filed under adhesives, Animal Parts.

Hide Glue part I : Meet Hide Glue

about hide glue headerThis is the first part in what will hopefully be a two or three, or even four, part series on Hide Glue.  Very few people are making really high quality glue these days.  The plan is to provide a solid introduction with practical steps to making high quality glue, and to cover the basics of using it.  Following posts will have to wait for time, energy and pictures.  You can subscribe on the right to receive notification of new posts via email so you don't have to stay glued to your screen.

Collagen Glue, aka hide glue or animal glue, is made from the parts of animal bodies which contain large amounts of collagen.  Collagen is abundant in animal bodies, but certain parts are highly concentrated sources of relatively pure collagen of the type useful for making glue.  Commonly used glue materials are skin (including fish skins), sinews (the fibers which connect bones to muscles) and antler.  Fish air bladders have been used to make an especially strong glue.  The common practice of using skin scraps to make glue has given us the term Hide Glue, which is generally used for all collagen glues regardless of the raw material used to produce it.  The materials are cooked long and slow to dissolve the collagen, followed by drying the resulting gelatin which is then reconstituted in water as needed.

There is a misunderstanding that glue is made from hooves.  The horny outer covering of hooves does not contain useful collagen.  Hoof sheaths and horns are more physiologically related to hair and are primarily composed of keratin which does not go into solution when cooked in water.  The bones and ligaments inside the hoof do contain a lot of collagen and have commonly been used to by glue boilers to make glue and neatsfoot oil.  Making glue from the whole lower legs is not generally a good choice for home producers due to contamination from fats and other unwanted substances.  If you try to make glue from the hoof sheath itself, it won't work.  I know, I’ve tried.  Instead, I recommend extracting some of the glue making parts from the lower legs and feet and then using just those, but that is for another post.

The gelatin used in cooking (jello, etc...) is just a refined grade of collagen glue.  Meat stocks that gel on cooling, also do so as a result of dissolved collagen.  Gelatin is a very nourishing food.

Hide glue has many traditional uses.  It is a very strong glue when well made and properly used.  Hide glue always remains water soluble, meaning that the joint will come apart if the glue reaches a certain moisture content.  As one can imagine, the water solubility of hide glue is often inconvenient and is one of the major factors in it’s replacement by modern moisture resistant glues.  Although sometimes inconvenient, hide glue’s water solubility can be an advantage.  It is still used in making fine musical instruments and by a few forward looking fine furniture makers, because the item can be completely disassembled with the application of steam to the joints.  Easy disassembly allows for repair without incurring any damage to the wooden parts.  Imagine the crime of repairing some amazing 300 year old violin using a permanent glue.  It would be severely damaged a hundred years from now when it requires repair again.

This old desk top is hide glued.  It was left in the rain and delaminated readily when wet.  If wetted evenly whole sheets could be pulled off of it.

Aside from water solubility, another factor in the replacement of hide glue by modern glues is the inconvenient fact that it must be used while hot.  Glueing up projects may be stressful even with modern glues, requiring speed and accuracy, but working with hide glue is much more exacting.  The glue should remain liquid until the joint is set and clamped, which means that it must remain warm.  Unfortunately, it is not advisable to apply hide glue to hot wood in order to keep the glue warm, because it can cause the wood to absorb all the glue.

The final blow to hide glue in modern industry and arts is that it does not store well in it’s wet state.  The old glue must be thrown out frequently and a new batch prepared.  Rotting glue loses it’s strength rapidly.  Attempts to make preserved hide glues that could be stored in a ready to use state have been made, but results have never been quite up to the traditional product.  So, real hide glue is just not convenient.

One other place where hide glue has retained some use is in the arts for sizing and gilding with gold leaf.

In paleotechnology, hide glue has many uses and is the strongest glue that we can make.  It is used to hold sinew wrappings in place, to size over paintings, as a binder for paint pigments, to glue materials together, and to glue the sinew backings or other coverings onto bows.  Making fine quality hide glue is well within the means of homescale technologists like you!

RECAP

Making: Hide glue is produced from Collagen sources in animal bodies such as skin, sinew and antler.  Accomplished by dissolution into hot water by long cooking, followed by drying the resulting gelatin and then reconstitution in water.

Advantages of hide glue:  accessible (you can make it!), easy to make, strong, easy repairs, nontoxic.

Disadvantages of hide glue:  must be used rapidly before it cools and jells, joints come apart when moist, glue rots easily once made.

Posted on July 20, 2013 and filed under adhesives, Animal Parts.

The Most Common Bark Tanning Mistakes: Pitfalls to avoid on your way to beautiful leather!

grain header

grain header

By Steven Edholm

UPDATED SEPTEMBER 2020

Hey!, the Buckeye Gathering barktanning class is coming up and I have bark on the brain.  This article is going to be awesome.  A lot of people ask my advice on barktanning and I see the same mistakes made over and over again.  I can help, because I’ve made them all too (and still sometimes do), so I know whereof I speak!  So listen up fledgling barktanners, because we can save you a lot of frustration, heartbreak and WTF moments.

PROCRASTINATION:  This is a common mistake in tanning in general.  I still do it all the time, unfortunately, but I shouldn’t and you shouldn’t either.  Bark tanning is more forgiving than some other types of tanning because some of the solutions the hide is put into can be preservative to a degree, but that shouldn’t be used as an excuse to keep putting off what needs doing.  The solutions used in liming and tanning are not foolproof and will not preserve the skin indefinitely, so try not to use their limited preservative power as an excuse for procrastination.  good luck with that.

procrastination can lead to problems such as this damaged grain, which has lifted from the main body of the skin.

procrastination can lead to problems such as this damaged grain, which has lifted from the main body of the skin.

USING CRAPPY HIDES:  For some reason, people tend to pick some crappy hide for bark tanning.  I don’t like to start any tanning project with a crappy hide.  It’s too much work to waste on something which can’t be better than the material which you are starting with in the first place.  If crappy hide is all you have and you want to experiment with bark tanning, working with just a small piece of it can be a great learning experience.  And in general, don't be afraid to "round out" scrappy skins, meaning trim off the rough stuff and tag ends, before tanning.  I also don't think it's a great idea to start with a really large hide.  Actually, squirrels are great and make a great starter project, and really nice leather.

This skin is scored. Try to start with decent skins, or use parts of them to experiment on rather than tanning the whole thing.

This skin is scored. Try to start with decent skins, or use parts of them to experiment on rather than tanning the whole thing.

LEAVING IN THE LIME OR BUCKING SOLUTION TOO LONG:  Leaving the skin in lime or a bucking solution too long is not uncommon.  The skin can stay in for quite some time and come out okay, or even great, but try to leave it in for a reason other than blatant procrastination!  This issue is dependent somewhat on the strength of the solution too.  Although long liming is sometimes used intentionally, and sometimes in weak lime, generally you want to keep the liquor strength up. In the beginning, you should probably process the skin when the hair slips out easily.  Overly long liming can weaken the skin and damage the grain. Keep the strength up by stirring or adding more lime as necessary. If using wood ashes, make sure they are strong enough to swell the hide well and again, keep the strength up as necessary. In either case, if the hide is not swelling a lot within a few days or the hair doesn’t start to slip within a week, bump up the strength. It is okay to use extra lime since only so much will dissolve into the solution at once. If there is extra lime, more dissolves when you stir it if the solution becomes “used up” by the skin.

NOT DE-LIMING ADEQUATELY:  Re-scraping to push out lime and dissolved tissue is called scudding. Rinse the skin thoroughly many times, and scrape over it on both sides between soakings. Use the tool backwards on the grain side so you don’t damage the grain and make sure there are no nicks in the blade. In other words, hold the tool just like you are going to flesh the skin, then turn it around so the underside of the edge just drags across the skin. This is also a better way to de-hair skins, see the video linked below. You will see a lot of dissolved crap, white lime and yellow gunk come out of the pores. You don’t have to scud the hair side every time, but do it once or twice until there is not much coming out. When the water coming out is mostly clear, and the skin has “fallen” back into it’s un-swelled, flaccid and floppy state, it is de-limed.  You can finish with bating or drenching (soaking in poop or fermenting bran respectively, but those are another story), or at least rinse with a splash of vinegar in water before tanning begins.

USING WEAK ASS MATERIALS:  It takes quite a bit of tannin to finish out a full skin from a medium sized animal, let alone something large like an elk or cattle skin.  There are tannins everywhere.  They are in most plants to some degree.  Finding sources rich enough, or abundant enough, to make good tanning solutions and tan hides safely and thoroughly is less common.  Don't use, old dead bark or dead leaves.  You need leaves or bark that have been gathered when fresh, and have not been rained on for a season, or worse.  Keep your eyes out for freshly fallen trees and get the bark when you can, storing it for later.  It is possible to use weak-ass materials, but it is not practical, nor very fun, and the results are likely to be disappointing.  In most cases, older trees have bark that contains more tannins than younger trees.  Stripping saplings may work, but be prepared to do a lot of it!  When you get that good material, chip it up fine.  Boiling large pieces is another common mistake.  You just can't tan a skin with some big chunks of bark floating in a tub... not gonna happen.

Gather fresh material whenever possible. Old dry bark that has sat out in the rain is poor in tannins. Be opportunistic as in this case, gathering bark from a tree that fell across the road.

Gather fresh material whenever possible. Old dry bark that has sat out in the rain is poor in tannins. Be opportunistic as in this case, gathering bark from a tree that fell across the road.

MAKING THE SOLUTION TOO WEAK:  This problem can happen for numerous reasons, some already covered above.  Many people are so terrified of case hardening, that they start with a very weak solution and then finally end up with a solution that isn’t even strong enough for a good start.  The skin can be put into a pretty strong tea in the beginning without adverse effects.  It can also be brought up in strength very quickly once the skin is partly tanned.  For instance, you can go from weak to medium over the course of a day and have the skin in a fairly strong solution on day two.  Case hardening is not common and in my experience must require a very strong solution.  I just threw some squirrel skins into a full strength tanoak tea and they came out soft and beautiful. (full strength meaning shredded tanoak bark just covered with water and boiled for hours, like the picture below.). Apparently, some materials cause case hardening more than others, but it is not hard to avoid and most err too much in the weak direction. It is only a problem in the beginning of tanning, so keep ramping up the strength as suggested next…

This bark liquor is awesome. It's hard to produce good rich liquor like this from tannin poor materials. It is possible in some cases, but be prepared to work at it by using the same water on two batches of material.

This bark liquor is awesome. It's hard to produce good rich liquor like this from tannin poor materials. It is possible in some cases, but be prepared to work at it by using the same water on two batches of material.

NOT STRENGTHENING THE SOLUTION ENOUGH DURING TANNING:  This is the most common, and possibly the worst, mistake.  The skin will use up tannins very quickly in the beginning!  No really. A well prepared skin will take up most, if not all of the tannin in any starter solution in just one day, or possible less, especially if it is agitated as it should be. The process slows somewhat until the skin is struck all the way through.  If the tan is agitated, the skin will tan quickly and the solution can be strengthened frequently to keep the process moving along.  The typical beginner scenario is to put the skin in a very weak solution to start with, and then just leave it there until the solution becomes completely used up, which can take only a day, or even just a few hours in some cases. But even putting it into a strong solution, it is remarkable how fast the tannin can be used up, requiring strengthening.

If the solution is not strong enough, the skin will begin to suffer damage and loss of substance.  Add concentrate frequently.  If you are using materials which are poor in tannins, you will need a lot of the stuff to tan a skin (a good reason to do smaller experiments before moving on to full skins).  Don’t judge by how much material you are using, judge by the strength of the solution and how the color is progressing through the skin.  Judging solution strengths is difficult and has to be learned by experience for the specific materials you are using, but I also just don't think it matters that much unless it's too weak, which will be fairly obvious with a little experience.  From what I hear from other people, and judging by my own experience, I’d say that a rule for beginners might be that if you think it’s strong enough, it could probably be a lot stronger.  After the color reaches the center of the skin, most of the tannin binding sites are taken, and the fiber takes up the solution only very slowly. But it can still benefit the leather to remain in strong solution to soak up as much as it can.

Every time you check on a skin or on a liquor, pick it up in your hand and look at it. Pour it out and look at it too. While different materials will look different, you need to start getting some idea of how to judge strength and this is the most accessible way.

This is one weak ass tanning solution, because the new well prepared skin has slurped up all the tannin overnight. There is basically nothing left in here to tan the skins. Color does not always equate to available tannin. Add concentrate frequently…

This is one weak ass tanning solution, because the new well prepared skin has slurped up all the tannin overnight. There is basically nothing left in here to tan the skins. Color does not always equate to available tannin. Add concentrate frequently in the beginning.

NOT MOVING THE SKIN ENOUGH:  This mistake is probably most important to avoid during the tanning phase, but it applies to any process where there is a liquor involved.  Any time a skin is put into a solution, stretch it over and move it around to be sure it is soaked all the way up in all areas.  Several visits may be necessary if the skin is not well soaked up to begin with.  Air bubbles trapped in the skin can also be an issue.   Many beginners stuff skins into a bucket or vat and just leave them.  The skins must have solutions contact all surfaces to be processed evenly.  It’s okay to fold or wad hides into containers, but there should be some room, and the skins should be stirred several times a day for the first few days and then occasionally until finished.  If not, they will not tan evenly and can finish uneven in color.  A good strategy for small containers is to remove the skins and put them back folded differently each time.  Just do it often enough. It is better to use large enough containers though. A bucket is hard to tan a deer skin well in, but an 15 or more gallon tub is pretty good.

This skin was dropped in the solution overnight and left there. Think what would happen if the skin was never moved? There are exceptions, but generally speaking, more the skin is moved, the more evenly and quickly it will tan.

This skin was dropped in the solution overnight and left there. Think what would happen if the skin was never moved? There are exceptions, but generally speaking, more the skin is moved, the more evenly and quickly it will tan.

DRYING THE SKIN WITHOUT OILING:  It is best to oil or fat-liquor the skin once it is tanned, and before it is dried out.  Otherwise the grain may be brittle and liable to crack on sharp bending.  Oil functions somewhat like moisture does in living skin, providing lubrication for the fibers and engendering suppleness. A skin dried without oil, or with just a little on the grain side should still be like leather. It should not be stiff or crunchy and the grain should not be very brittle to the point where it cracks when bent just a little bit. If that is the case, the skin was damaged in tanning, likely from long soaks in weak tanning solution.

Oiling the skin re-lubricates the fiber and makes for a more wear and bend resistant grain.

Oiling the skin re-lubricates the fiber and makes for a more wear and bend resistant grain.

OVER OILING: I’ve seen many hides that are over oiled. You don’t want the hide filled with oil. You want the fibers coated lightly with oil in most cases. It can be challenging to get oil into thick heavy skins, but just do your best and worry more about over oiling than under oiling.

BAD WATER:  Water with iron can make skins dark and brittle.  If you have to use high iron water, try to keep the time the skins are in the water to a minimum.   If you have very hard water,or especially if it contains iron, consider collecting rainwater for liming and bark solutions.  It is difficult to collect enough rain water for rinsing processes however.

Whelp, there are of course a lot more details to fill in but, given a basic working knowledge of tanning, that's actually most of the wisdom you need to know to successfully barktan skins!  If you know someone dabbling in barktanning, send them this post.  I rely mostly on word of mouth to get people here.  Please let me hear your experiences and experiments in the comments section.

Posted on April 13, 2013 and filed under Animal Parts, Tanning.

Bending Wood: what you need to know

By Steven Edholm Bending wood is a useful, and sometimes necessary skill.  In this post I am going to present a few pieces of information which are key to successful wood bending of any kind, paleo or otherwise.  The most common need for bending wood in paleotechnology is for straightening wildcrafted shafting such as arrow shafts, hand drills and atlatl darts.  There are, however, many other uses for a straight stick.  There are also plenty of uses for curved sticks, such as in the making of hoops and basket rims.  Wood bending can be dropped neatly into the skill set of anyone who can internalize the following ideas.

*Wet (or green) wood bends more easily than dry wood. Living wood requires a degree of flexibility to adapt to it’s environment, so green or wet wood is naturally flexible.  Also, if the wood is heated to assist in bending, the heat will spread more rapidly into moist wood than it will in dry wood.  Some items can be bent while green, or after soaking, without any heating.

Green wood bends easily as demonstrated in these heart shaped apple tree grafts.

*Very fresh green wood can be slightly more brittle than barely “wilted” wood. Usually only slightly, but worth keeping in mind.  Heating very fresh wood will also effectively “wilt” it.

*Hot wood bends more easily than cold wood. Like way easier, no really.

Hot wood, and especially hot, wet wood, bends more easily than cold wood.  Heating wood through thoroughly makes bending WAY EASIER, while moisture lends increased flexibility to the fiber structure.

*Scorched wood is inflexible and liable to crack on bending. Wood is easily scorched during heating over hot coals.  Scorching changes the character of the wood making it at once more hard and more brittle. Ideally the wood should not color at all when heated.

Jay oiling a bow tip stave for heating and bending.  Oil helps spread the heat into the wood more quickly and evenly.  This is a dry bend and care must be taken not to scorch the wood while heating, especially with an item that will undergo great stress.

*Give the wood time to bend (slower is safer). Taking a gradual approach, will give the wood fibers time to stretch and compress around the new shape.  Rapid sudden bending is more likely to result in cracking.

*Wood does not bend evenly around knots or other variations in thickness. Even thickness is crucial to even bends.  Some variations in shape and thickness can be worked around with the hands by applying more or less pressure to certain spots, but generally it is difficult and sometimes impossible to force wood to bend where it doesn't want to.  Also, wood forced to bend around variations in thickness will often revert over time as the item is exposed to variations in temperature and humidity.  Thick areas can often be thinned to allow even bending, but it is best to thin on the inside of the bend so as not to violate the grain on the back where the wood has to stretch.

when bent into a hoop, this branch shows the inconsistencies in thickness by bending unevenly.

With a little thinning in the right place, the hoop almost falls into a round shape on its own.

Willow withes are grown or collected as even tapering rods.  Uniform shoots without great variations in thickness such as knots allows for safer easier bending.

*Thin wood bends more easily than thick wood.

Locust choker blank ready for bending.  This wood bends easily because there is less wood to compress on the inside of the bend than there would be on a thicker piece of wood, while the wood on the outside of the bend undergoes less stretching.

*Violations of grain are risky. a trunk or stick is made up of concentric rings of growth.  Cutting across the rings violates the grain and allows the wood to separate more easily along the growth rings.  when using wild wood, it is ideal to leave the back of the bend at one growth ring, even if it means leaving knots intact and raised above the surface.   Sometimes you have to cut across the growth rings whether you want to or not, just be aware that the wood is stronger if they are intact.

Violations of grain, as here when I a knot is cut through, are risky.  The stick has been reduced to an even thickness which could help it bend more evenly, but it becomes much more likely to break when bent.

*Quarter sawn wood is safer to bend than plain or flat sawn wood. Plain sawn wood will show layers of violated grain on the broad face of the lumber.  These violations of the wood grain are likely to result in de-lamination of the layers when bent.  Quarter sawn wood will show grain lines that are tightly parallel on the broad face and is more likely to hold together under bending stress.

"plain" or "flat" sawn wood is the epitome of violated grain on the flat side, and is often a poor choice for bending.

Quarter sawn wood shown fine parallel grain on the broad face and is much more likely to bend without breaking.

*Thickness of the wood is crucial. Take a 1 x 4 inch board.  If it is bent with the broad face out, it will bend some.  If it is bent on edge, it will barely bend, if at all.  Very thick or deep wood is hard to bend because there is so much wood to compress on the inside of the bend and an equal amount to stretch on the outside of the bend.  A 1/2 x 4 inch board will bend more easily and a 1/4 x 4 inch yet easier.  But neither of the thinner boards will bend easily in the 4 inch dimension because that 4 inches is still a limiting factor.

*Sharp bends are more likely to crack in bending than gradual bends are.

Thinning can make the difference between a successful bend and a blowout.  Note the thinning is done on the inside of the bend in this basketry technique. The wood is compressed on the inside rather than stretched.

*Retain the position while drying and/or cooling. Hold the bend until the piece is cooled (if heated dry) or dry (if steamed, soaked or green).  Heating and moisture provide plasticity for easy bending, so leave the piece bent until plasticity is gone in order to retain the new shape.

steamed and bent chokers tied into place to cool and dry.

Whelp, that is most of what you need to know to bend wood successfully!  We’ve got some cool posts in the chute on stuff like paints, fire and barktanning so stay tuned!

Jays happy bow.

finished chokers

Posted on March 26, 2013 and filed under Uncategorized.

Understanding Lime: an introduction to forms of lime and where they come from

burning shells light

By Steven Edholm

I used to be so confused about lime.  Some limes have more than one name and more than one use which can be difficult to keep sorted out in your head when you have no frame of reference.  Lime is super neat though, and worth understanding.  I’ll attempt here to present the types of lime and their uses in a way that is accessible to people without that frame of reference... or maybe offer an accessible frame of reference for understanding lime.  For more on lime burning and the lime cycle see The lime squad I and Lime Squad II posts on the Turkeysong blog.

First off, lime is cool, and so useful!  Understanding what uses there are for lime can help us understand the three basic forms of lime that we might have access to or make.  The basic use groups are these.

Reactive uses:  use the caustic nature of limes to chemically attack plant and animal substances in food processing and tanning of skins.  In other reactive uses, lime reacts chemically with other elements as in dyeing or to potentiate the drug alkaloids found in Coca leaves and Betel nut.

Plastic uses:  These are used for building, painting and in the arts.  the lime is shaped it how we want it before it dries and hardens.

Agricultural uses:  Used to adjust soil acidity into a range suitable for most plant growth, as well as to provide calcium.

Nutritional uses:  as a calcium supplement.

Filler uses:  Powder used as a filler in the arts for painting and sizing.

Fluxing:  Used to lower the melting temperature of unwanted materials during smelting of metals.

Thats enough basic uses for us to tackle in this short article about understanding the different forms of lime.  In future articles, I may address each use group more specifically to cement that understanding.

Shells in a garden trench prepared for a perennial planting.  More finely ground shells are more useful, as is ground lime stone.  By the way, bones (also seen in the trench) do have quite a bit of calcium, but are not used in the production of lime.  They are more useful as a source of phosphorous.

All lime comes from biological processes!  Wow!  that’s amazing.  All those billions of tons of limestone, chalk, marble, shells, coral and all that stuff was collected from the environment by living organisms.  When the organisms died they left deposits of their calcium rich shells which have changed form over time.  That's humbling.

Lime can exist in three basic forms in a simple “cycle”.  The lime can change from one form to the next in this cycle, and back again.  The basic material is calcium with variations in what is and isn’t attached to it.  We start the cycle at limestone.

Limestone:  Limestone, shells, marble, chalk etc.... there are various forms of limestone, but they are all basically the same material.  One type contains a lot of Magnesium in a similar form and we call that Dolomite lime.  Dolomite's uses are similar to regular limestone.  The limestone form, including shells of all kinds, is Calcium Carbonate.  It is calcium with 3 carbon atoms attached to it.  You know, carbon as in carbon dioxide the famous greenhouse gas.  We are all familiar enough to know what stone and shell are like.  They are hard and tough.  Maybe more important to understand is that they are not really reactive.  We can throw rocks and shells in water and they just sit there.  The take home message is that they are stable so they resist the elements.  Calcium Carbonate is the most natural and common form of lime and the one that other forms of lime will naturally turn into if exposed to the environment.

Quicklime:  If we take our Limestone rocks or shells and heat them up to a red heat, we drive off the carbon completely replacing those three carbon atoms with one oxygen atom to make CaO (calcium oxide) one calcium to one Oxygen.  If you're starting to get nervous about all that chemistry crap, never mind the chemistry.  The important thing to know is that the burned lime is highly unstable and very quick indeed to react to moisture.  Unless stored in a completely sealed container, it will quickly begin to react with the elements of the environment and start the process of turning back into limestone.  Quicklime is so unstable (and unsafe to have around) that it should be slaked processed into the next form) as soon as possible, preferably right after burning.  Quicklime is very light in weight without those carbon molecules which are now floating around in the environment somewhere as greenhouse gasses.  It is also thirsty for water which it can pick up from even the little bit in the atmosphere.  If left out, quicklime will usually absorb moisture from the air, often falling into a pile of fine powder which brings us to our next stage of the cycle...

calcined shells

Hydrated lime and lime putty:  When water is added to the thirsty quicklime, it absorbs H2O molecules rapidly forming Calcium Hydroxide.  One Calcium, two Oxygen and two Hydrogen.  In this process heat is given off and the mixture can even boil violently.  There are a couple forms of calcium hydroxide. If the calcium hydroxide is made in the form of a putty with excess water and stored in this wet state, it is known as lime putty.  Lime putty is the most reactive form of calcium hydroxide,  and the most  stable way to store it.  Lime putty is completely safe from conversion into limestone, as long as it is kept wet with no exposure to the air.  More commonly, Calcium hydroxide is found in the form of a fine powder known as builders lime, type S or hydrated lime.  This powder of lime is often used in tanning and building because it is convenient to store and sell in the dry form, but it is less stable because a portion of it will turn back into the limestone form with exposure to air, which also makes it less reactive.  Don’t worry if you are getting confused already, we are going to drive home this information with practical examples and if you ever use lime, you will begin to form a context for understanding and remembering the different forms.

Slaking quicklime in a barrel.  Note the bubbles, this is actually boiling from the violent reaction when water is made available.

The half of the burnt shell on the left has had moisture added to it ( I peed on it.. no reallu) and has fallen into a powder making hydrated lime.

So there are the three forms of lime, but to close the cycle the last form, calcium hydroxide or hydrated lime, has to turn back into limestone.  This process is simple and we hinted at it already.  When the lime putty is dried it absorbs carbon from the air turning back into limestone.  In the case of hydrated, or powdered lime, the powdered lime is wetted first and then absorbs carbon as it dries, though it doesn’t carbonate as thoroughly as lime putty.  You might be getting the idea that I’m partial to the lime putty form rather than the powdered form, and you’re right, but the powdered form is useful too and often what is available.  More on that later...

BURN *So, we have gone from limestone rocks or shells which we heated up to drive off carbon causing the atmosphere to warm up, killing the planet.

SLAKE *Then we added water to the resulting thirsty quicklime which boiled violently or fell into a fine powder depending on how much water was added.

CURE *Then we let the spreadable, wet lime putty, or hydrated lime paste , dry slowly.  As the lime dries is reabsorbs carbon from the air saving the planet form carbon dioxide poisoning and forming limestone again.

We can use lime at these various stages for different purposes.  There are so many different uses for lime, that we’ll defer most of that discussion for another time, but here are the characteristics of each type of lime discussed in the context of some common uses.

Limestone, Shells, Etc:  (Calcium Carbonate).  Having been stabilized by the absorption of Carbon dioxide, Limestone, shell, marble etc.. are basically stone as we commonly think of it.  The stone can be used for building and paving of course.  Limestone and shell can also be used in agriculture in a powdered form, and while other forms of lime can be applied to the soil as well, it is usually the carbonate form that is used.  Lime increases the ph of soils by buffering soil acidity.  Calcium Carbonate is fairly stable and non-reactive, but acids, like Carbonic acid naturally found in the ground, slowly dissolve the lime in the soil which is washed out by rains.  Lime, usually as ground shell, can also be used as a nutritional supplement and in animal feeds, particularly to provide a source of calcium for chickens ensuring strong eggshells.

Quicklime:  Quicklime is dangerous to handle and store because it is highly reactive.  It heats rapidly and undergoes a violent reaction when water is applied.  This process is called slaking.  If the water is applied slowly and in measured quantity, the quicklime will fall into a very fine powder of hydrated lime.  If it is slaked with more water, the water may boil and spit hot lime putty and caustic alkaline solution all over the place.  It also expands a great deal during slaking, which is sometimes taken advantage of in building.  By using the still expanding quicklime to mortar walls, the lime, sand mixture is forced into all crevices in the stone.  Quicklimes uses  in the arts are actually minimal.  The most common use of quicklime is probably as a flux in smelting metals, though it is often added in the calcuim carbonate form as shells in primitive smelting, which then cook into quicklime in the smelter.

Hydrated lime and lime putty (Calcium Hydroxide): This is the form of lime with the most uses in arts, trades and cooking.  It is chemically reactive, alkaline and caustic.  Being highly alkaline, it modifies or attacks other materials like some proteins and cellulose, making it very useful.  it also reacts with fats to form soluble soaps.  When it dries it turns back into limestone as we said, which is non-reactive except with acids.  Calcium hydroxide can be used to prepare skins for tanning by attacking certain proteins to release the hair from the skin, and dissolving various substances in the skin fiber which can then be removed by washing.  It can also be used to process corn to make it more digestible in a process called nixtamalization (for more on which see this excellent page on corn processing and tortillas).  There are many many uses for Calcium Hydroxide.

  • Type S or Hydrated Lime (aka, builders lime):  is a fine powder form of calcium hydroxide.  Hydrated lime is convenient to store and ship, but is not as reactive as lime putty and makes a relatively poor material for building purposes (even though it is often called builder’s lime which says more about our building ethic than anything else).  It’s convenient form however makes it the most common form of Calcium Hydroxide and it is perfectly fine for some uses like preparing skins and nixtimalizing corn.
  •  Lime Putty:  Lime putty will keep indefinitely if stored with a thin layer of water over it and can even improve over time.  Some lime putty is stored for years to make fine quality limes for exacting uses such as fresco paintings.  It is the most caustic form of Calcium Hydroxide and should be the first choice for building purposes and arts unless a powder is required.  When used for its reactive properties, less is needed than when using hydrated lime.  When used in building, it has better workability, carbonates more thoroughly and consolidates into an all around more durable material upon curing.  Adding water to hydrated lime does not make lime putty, it has to be made during slaking by the addition of a larger amount of water.

Beautiful creamy, chemically reactive quick lime keeps indefinitely under a thin layer of water.

RECAP:

*Lime is neat and useful!

*There are three basic forms of lime with different properties and two basic forms of the most used form, which is Calcium Hydroxide.

Shells and Limestone are fairly inert and stable as they are.

burned shells narrow

*Calcium hydroxide in the form of either powder or putty is caustic and reactive with many substances making it very useful.

*Calcium hydroxide as hydrated lime powder is convenient and fine for many uses, though not as reactive.  It makes a poor building material.

*Calcium hydroxide as lime putty stores indefinitely underwater, has the highest viability and is best for building uses.

Posted on March 3, 2013 and filed under materials.

Welcome to the Paleotechnics blog!

handdrillcloseup  

Welcome to the Paleotechnics blog.  While this blog springs forth from various motivations, the one thing we would like to be sure of is that you learn something when you visit us here.  What will you learn?  The topics will vary quite a lot, but most will fall in the realm of natural living skills and getting to know the natural world and the articulations of life around us.  A few posts may venture more into theoretical realms and philosophy, but again within the same focus on human participation in nature at a basic level using the simple equation-  Learn stuff > gather stuff > make things > use the things you’ve made = personal empowerment and greater self reliance.  We have well over a hundred potential blog post topics already jotted down.  topics will cover tanning skin, stone working, the nature and potential uses of materials, processing of materials, common mistakes, cordage, fire topics, tips and techniques for various skills, plant profiles, wild foods, photo essays and more.  Our lives are built around gaining and sharing knowledge, so we're excited to share in this format!

Paleotechnics has always been about de-mystifying and making accessible natural living skills and basic technology.  The business manifested as an outgrowth of this passion and continues to strive to empower people to become less domesticated and more self reliant.

buckskins on woven wall

Posts will likely be infrequent and short to medium in length.  The goal will be to hold subjects to an accessible degree of detail or break them up over more posts.  We plan to write much more extensively on some of these subjects in the future.  If those plans come to fruition, the books will be available as paper and/or ebook versions.

While this is a business, and we do need to make money, we would like to strike a balance between making a living and providing free information for people with the motivation to seek it out and assimilate it.  This blog provides a free service to expand and refine your skill sets.  If you want to know more about a subject consider buying one of our publications or taking a class.  In classes, we aim to be sure that you will not go away disappointed.  Paleotechnics classes are geared toward empowerment through knowledge, and we mean it.  Most of our income goes to purchasing Turkeysong, the experimental paleo/homesteading base camp in the Mountains of Northern California where we have access to space and materials to figure this stuff out.

Please visit us again, and consider subscribing to our blog in the side bar, to receive email notifications of new posts.

buffalo parfleche

Posted on January 30, 2013 and filed under Uncategorized.

Better Sticks, Staves, Shafts and Withes: finding and encouraging straighter shoots

hand drill shafts lined up on table

By: Steven Edholm

Need straighter, longer, or more evenly tapered sticks?  Who doesn’t?  It’s not always easy to find a nice stick when you need one.  We might have plans for certain types of sticks, but nature has priorities other than providing us with them, and doesn't necessarily have the same criteria for "better sticks" as we do.  Knowing where to look for straight wood, and how to manage plants for the production of such, is essential knowledge in the paleo arts.  Now that it's winter, it's time to harvest twigs and sticks for our baskets and hand drills and things like that, so I thought a post on the subject would be appropriate.

Many basketry styles require long  and relatively straight materials that are difficult to find a naturally occuring growth.

What we're looking for:  More uniform than average twigs, sticks and staves find many uses.  Arrows, hoops, spears, hand drill shafts, basketry elements and bowstaves are some classic examples.  There are several characteristics that we are commonly looking for in sticks for making stuff:

Straight (or at least with long gentle curves instead of short sharp bends)


Free of branches


Gradually tapering (i.e. not a very different diameter at the top and bottom)


Long (of course that’s relative)


We may need only one or two of these characteristics, but we would often like to find them all in the same stick.

Nascent v.s. mature growth: Some trees and shrubs grow naturally straight and branch free, but the norm is various degrees of curved, zig zagging and short jointed branches growing in all directions.  Many species do however have the capability of growing straight given the proper stimulus, resources, and conditions.

When trees and shrubs grow from seed, they get off to a slow start.  Each year, the seedling root system gets bigger foraging nutrients and water underground and storing some of those resources for spring growth.  A few seedlings luck out and get the best spot ever, growing rapidly upward, but growth in seedlings is slow as a rule.

Even with the resources gathered by a large root system, more mature trees and shrubs typically grow slower with short joints and crooked branches.  This is largely due to the fact that there are so many branches competing for those resources.  The growth of a plant is largely determined by competition with itself.  If we reduce competition, we can channel an abundance of growth energy into fewer growing points- enter nascent growth...

You would probably not be able to find a single decent hand drill shaft in this older buckeye tree.  It it were burned or cut back though it would grow a profusion of new tall straight shoots from the stump.  The tree is adapted to this kind of treatment because of aeons of exposure to wildfires.

Nascent growth is fast vigorous growth.  The defining factor is that is has access to resources for rapid extension of the shoot during the growing season.  There can be numerous reasons that the shoot has access to the food and water needed for rapid growth.

One way the shoot may gain advantage in the structure of the tree is by it’s placement relative to the physiology of the tree.  The shoots known as water sprouts, or suckers, on fruit trees are a good example that many people are familiar with.  Hormones within the tree can suppress or encourage growth and the water sprout has managed to bypass the growth suppression hormones taking a large share of food for it’s growth.

Conditions conducive to nascent growth: Dormant buds can be stimulated to grow by a change in the position of the branch or trunk.  The tips of branches and trees usually send growth suppressing hormones down to stunt growth of lower branches, while continuing to grow taller themselves.  This phenomenon for the sciencey among you is called Apical Dominance.  Lower branches, guided by hormones from above, make less vegetative growth and typically do the work of reproduction, producing flowers, fruits and seeds.  If the position of the branch changes, say if a trunk falls over to a horizontal position, or a branch is bowed down heavily by snow, is bent low by a heavy fruit load or is pinned down by a fallen tree, the buds along the top of the branch are now higher than the other buds on the branch.  No longer receiving the “no grow” hormonal message from above, they grow like crazy often causing a mass of long straight shoots reaching for the sky.

When this bay tree fell over many years ago,  Dormant buds in the trunk sprouted and grew straight up.  The once dominant tip of the tree practically stopped growing.

Aside from fallen trees and bent down branches, we can look to some other natural phenomena for opportunities to gather nascent shoots.  Fires and floods can provide these opportunities.  Natural fires are common in many areas and not uncommon in most.  As a result many plants are fire adapted.  When they are burned over, most trees and shrubs can sprout back and grow new structures from their well established root systems.  After a fire, the root resources that supported the whole plant are now channeled into fewer shoots causing them to grow rapidly to compete for light and outgrow predators.  It is in the best interest of the plant to reach a mature stature and begin reproducing as quickly as possible.

Floods provide a similar effect by damaging the above ground portions of plants, though often the shoots will grow in response the plant having been bent over by flood waters rather than torn away.  Plants that grow along river banks and sandbars are well adapted to flooding and usually produce copious shoots after a high water winter.

Practices for encouraging nascent growth:  Practices for managing plant growth are used the world over in traditional cultures and must stretch very far back into the past.  It should be no surprise as it is easy enough to put two and two together when observing natural phenomena.  Now that we know some phenomena that cause nascent growth, we can use management practices to encourage shoots when and where we want them.

Coppicing and pollarding are practices in which the plant is cut back very hard during the dormant season, removing all growth since the last harvest.  The only difference between a coppice and a pollard is that in pollarding a trunk and/or a branchlike tree structure is maintained but headed off at the same point periodically, while coppiced plants are cut at ground level.  Some plants that coppice well, such as willow and osier dogwoods, can be cut to the ground every year for basketry material without suffering any setback, though they are sometimes cut on a multi-year cycle to produce larger material for fencing, fuel, timber or other uses.

willow coppice at Frey's

Cuttings of basket willows in a wet ditch planted for coppice at Turkeysong. The coppicing will begin after a few years of growth when the plants have a root system to support regrowth.

Plants can also be burned to the ground to stimulate new growth.  This is nothing more than coppicing by fire.

One last method I’ll leave you with is bending.  One way to farm shoots on some plants is to bend tall shoots over to a horizontal position, or better yet in a bow shape with the tips lower than the top of the bow.  In some plants new growth will sprout up along the bent branch.  If the branch is high enough the shoots can have an advantage in outgrowing browsing animals like deer.  Browsing could shorten your shoots or cause them to branch or have crooks.  I've been told that this method was used to produce arrow shafts of Mock Orange by Indians in Northwest California, but haven't had an opportunity to try it.

How plants grow:  There are many factors to consider when deciding what to cut and when, such as population density, make up of the forest, management goals, human use and infrastructure, what animals depend on the plant for their living and so on.  Possibly of greatest importance is to know how a particular species grows before you start chopping it down to make sticks.  Most plants will sprout readily from the base, but some will not grow back when cut down.  Others may sprout back, but will not tolerate continual annual coppicing.  Careful observation of natural and human damage to trees and shrubs and their response over time will usually give you the clues you need to get started.  Road crews regularly coppice trees and shrubs along roadsides providing useful materials as well as clues to plant responses to coppicing.  Recently logged or burned areas are other places to start looking at plant regrowth patterns.  It is generally best to cut near the dormant season, anywhere from when the plant growth stops in the fall, to soon after it begins again in the spring.

Given our seeming distance from nature in modern society, it is easy to view cutting down trees and shrubs as inherently negative, as if nature sorts itself out perfectly, but this is not so.  Human harvesting and management practices can have both positive and negative effects.  Often the effect may be negative for one aspect of the ecology and positive for another... in other words, just different, or possibly more accurately an issue of perspective and values.  It is especially true when dealing with logged over land (which is virtually all that is left to us) that some human intervention can have an effect which would be hard to argue as other than positive.  These decisions require some knowledge to be effective and we all have a lot of homework and observation to do in order to earn an honorable place in the scheme of things.  Natural systems are typically tough and chaotic environments and therefore they and their citizens are for the most part fortuitously resilient.  This resilience is amply evidenced by the phenomenon of nascent growth.

A Quick RECAP!

*Straighter, branch free, evenly tapering, long and otherwise more uniform sticks are commonly needed in the paleo arts.

*Many plants are evolved to recover quickly from damage growing up straight and fast.  This quick new growth is known as nascent growth.

*Natural phenomenon such as fires, flooding or wind storms can provide opportunities for the harvest of Nascent shoots and trunks.

*Coppicing (cutting to the ground) and Pollarding (cutting higher up on the trunk) are common pandemic practices for cultivating nice sticks.

*Knowing how a particular species grows, and how it fits into the local ecology can keep us from making management mistakes.  Plants at all stages of growth help provide this information if we pay attention.

For more information and philosophy on sustainable harvest practice see Paleotechnics bulletin #1:  Sustainable Harvest:  approaching wildcrafting with knowledge and intent
.

Before there were toy stores, there were sticks.

Posted on January 2, 2013 and filed under Fiber, materials.

Deck the Halls With Beads of Berries: paleo holiday decorating with madrone!

madrone berry macro 2

The roots of our holiday symbols stretch far back into the past.  Greenery and red berries brought into the house are the primary symbols of the holiday season for western culture.  These symbols once meant more to people in a time when we need to celebrate, life, hope, warmth and renewal.  Madrone berry beads are a beautiful addition when moving towards a sort of holiday vernacular of the west coast region.  They are attractive, free, not only safe, but edible, and can be returned to the earth from whence they came when we are done with them.  They will last for at least several seasons if well made and cared for.

Paleotechnics usually sells madrone berry garlands and necklaces around the holidays.  After years of stringing and drying the berries, we have some tips on making your madrone beads look their best.  You may or may not be able to follow all of these tips on berry quality depending on what berries you have access to, but we all have to use what we are fortunate enough to find.  We are often asked how we get our garlands so uniform and beautiful.  The answer is attention to detail as in so many other pursuits in life.  So, here are those details and a few other tips.

*Use red string.  Red embroidery thread doubled up works very well.  We have rarely had to buy it new since it is often found in thrift stores.

*Sort your berries carefully avoiding berries which look at all sooty or splotchy.  Sooty berries can get sootier as they dry.  Small black specks are common as well.  The specks will not grow in size, though they will be very visible on the dried berry.

madrone berry cluster 2

*String similar sizes together.  Remove all the berries from the stem and then string the largest berries from a double handful at a time.  Put the berries on a flat tray or dish one layer thick so that it is easy to see the different sizes.  Once the largest berries are strung from that double handful, dump them into a separate container and grab a second double handful, string the largest from that lot, and so on.  That way each round through you are stringing the next smallest size of berry.  If you want to get fancy, you can taper them from small to large, etc.

*Thread through the stem end and as straight as possible.

*String several berries onto the needle before moving them down the string.  This trick just saves time.

*String about a foot of berries near the needle and then scoot them to the end of the string by moving them down one handful at a time, another time saver.

*Once the berries are all strung, go back through them and remove crooked ones.

*Snug the berries up close together.  don’t squish them, but you want them uniformly cozy.

*Dry quickly.  Dry the berries quickly.  Very slow dried berries can turn black and begin to decay.  Hanging above a woodstove or heater is a perfect way to get them dried fast.  It can still take a week or more, but the sooner the better.  Avoid direct sunlight to retain vibrant color.

*Don’t move the berries on the string once they begin drying.  Seat the berries snuggly together on the strand, hang them up, and leave them alone to dry.  The berries will shrink and stick to the string spacing themselves evenly.

*Store the garland away from mice and insects and away from direct sunlight.

madrone berry garland hanks 2

*And finally, watch out for Kissing Bugs!  Kissing bugs are a parasitic biting insect that really likes living on Madrone berry clusters.  They commonly feed on birds and birds love madrone berries, so that probably explains why they are so commonly found there. They are around 3/8 of an inch or smaller.  I’ve never been bitten, but they are very common.  I recently sorted the berries off of three plastic shopping bags full and found as many as four in one bag.  They will usually stay on the berry clusters rather than venturing off, but I like to remove the berries from the stems outside, so the bugs don’t end up in the house.  I examine each cluster carefully before I start working with it, but still keep my eyes peeled as I’m working.  They are difficult to spot.  The Bugs are blood sucking and often bite near the mouth, thus the name.  A study in Arizona found that they frequently carry a parasitic disease than can cause serious chronic health problems.  They often bite at night, so you don’t want them in your house!  I have never noted them to be aggressive toward me at all, and suspect that they would rather feed on something besides people.

kissing bug 2

Posted on December 3, 2012 and filed under Uncategorized.

Baynutting: Tips for Harvesting, Storing and Using California Bay Nuts

NOTE:  Bay nuts must be properly roasted to be edible to humans.  In spite of our best efforts to the contrary, we still commonly encounter people who are not roasting their bay nuts properly.  Most commonly, the nuts are not dried before roasting.  The second most common problem is roasting too cool.  The toxicity of unroasted bay nuts is unknown, but they are probably not good for you.  A tickling irritation in the back of the throat, almost like a burning sensation, is indicative of inadequate roasting.  Please read and follow directions.)

Bay nut season is starting here in Northern California and it appears to be a good year. They should be raining down from trees up and down the coast for the next month or more.  The season varies year to year.  Sometimes it will extend into late November or even later.  Ripening times also vary among individual trees with some dropping early and some later on.  Here are some tips to increase your success and enjoyment with baynuts this year and for years to come!  See this article on the Paleotechnics website for a more in-depth treatment of bay nuts and Bay trees.  And, look for a definitive book on bay trees and baynuts from paleotechnics by fall 2014!  Follow us onfacebook to stay informed.)

*Harvest the nuts in a timely fashion.  You don’t want them to either mold, or to start undergoing the physiological changes that happen when they begin sprouting.  It’s best to harvest the nuts before the husks are very dried or very rotten.  It is easiest to husk them when the outer coating is soft, but not mushy.  They are ripe when they begin to drop naturally from the tree.  If the husks are too firm and difficult to remove, let them sit around and ripen for a day or three.

* don't put off Husking the nuts:  When they are soft enough, husk them.

* Rinse the nuts in several changes of water briefly before drying.

* Dry soon after harvesting.  The nuts are easy to dry and may do fine in a warm well ventilated room.  If possible though, keep them near a heat source like a heater or woodstove.  If the sun is out, put them on the dash board of a car with the windows just cracked or simply out in the sun on trays during the day, bringing them in at night.  When fully dry, the nut inside the shell will be somewhat hard and brittle, not rubbery or flexible.

* Store dry nuts in the shells.

* Always dry the nuts before roasting!  Roasting the green nuts is a common mistake, it doesn’t work.

* Roast the nuts in the shells.  They can be roasted out of the shell, but our experience is that they roast more evenly in the shell.

* Roast quickly, stirring often: Roast at 425 to 475 degrees Fahrenheit.  Stir the nuts every 2 to 3 minutes without fail for about 20 minutes so that they roast evenly.  Set a timer so that you don’t forget.  If the oven heat is at all uneven, as many ovens are, turn the pan 180 degrees a few times during roasting.  (Edit:  We've been using a popcorn popper to roast lately.  Seems to be working very well.  See this post.)

* Don’t roast more than you can use soon, and keep the roasted nuts sealed in a small jar or a plastic bag until consumed.  They go stale quickly and are best eaten immediately after roasting when they are at their tastiest.   Traditional use seems to have been mostly roasted in hot ashes around the fire for fairly immediate consumption.

* Roast them how you like them.  As long as they are roasted enough to get rid of the strongly flavored volatile oils that tickle and irritate the throat, you can roast the nuts as dark or light as you like.  The color can range from a light brown (the color of coffee with a little cream) to very dark brown.  Take some nuts out early and leave others in the oven a little longer to figure out what your  preference is.

* Don’t eat too many at once!  while tolerance varies, bay nuts do contain a stimulant and can totally wig some people out!

A few additional points:

* Bay nuts are one of the few foods that are high in the rare fat lauric acid, also found in coconut oil and ascribed numerous health benefits.

* The flesh of bay nut husks are edible when ripe.  The upper (stem) end of the nut is the best part.  The flesh is similar to avocado, to which they are related.  It is more of a nibble than a significant food though.

* The fat in bay nuts is very stable being almost completely saturated, so the un-roasted nuts can keep for years.

* Roasted bay nuts make awesome bait for trapping mice and packrats, who can smell them from a long way off and seem to find them irresistible.

Related post:  Roasting Bay Nuts in a Popcorn Popper

Posted on November 4, 2012 and filed under Uncategorized.